我的資歷
<canvas> 這個詞彙是在 2006 年 Firefox 2.0 版推出時,我在 Ajaxian 上看到一篇文章,介紹了轉換矩陣,這啟發我建立第一個 <canvas> 網路應用程式:Color Sphere (2007 年)。這讓我沉浸在色彩和圖形原件的領域,並激發我創作 Sketchpad (2007-2008),希望在瀏覽器中打造「比 Paint 更優秀」的應用程式。這些實驗最終促使我與多年好友 Charles Pritchard 共同創立新創公司 Mugtug。我們正在使用 HTML5 <canvas> 開發 Darkroom。Darkroom 是不會破壞原始相片的照片分享應用程式,結合了像素濾鏡和向量字體與繪圖的強大功能。
簡介

<canvas> 可讓 JavaScript 程式設計師完全控管螢幕上的顏色、向量和像素,也就是螢幕的視覺組成。
以下範例將處理 <canvas> 中未受到太多關注的一個區域,也就是建立文字效果。您可以想像,在 <canvas> 中可以建立的文字效果種類繁多,這些示範只涵蓋其中一部分。雖然本文處理的是「文字」,但這些方法可套用至任何向量物件,在遊戲和其他應用程式中創造令人驚豔的視覺效果:
<canvas>中的文字陰影。- 類似 CSS 的文字效果,可在
<canvas>中建立裁剪遮罩、在<canvas>中找出指標,以及使用陰影屬性。 - 霓虹彩虹、斑馬反光效果鏈結效果。
- 類似 Photoshop 的文字效果,在
<canvas>範例中使用 globalCompositeOperation、createLinearGradient、createPattern。 <canvas>中的內外陰影- 揭露鮮為人知的功能:使用順時針或逆時針捲動,建立陰影的反向效果 (inner-shadow)。
- Spaceage - 生成式效果。
- 生成式文字效果,在
<canvas>中使用 hsl() 色彩循環和window.requestAnimationFrame產生動態感。
畫布中的文字陰影
我最喜歡的 CSS3 規格新增功能之一 (與 border-radius、web-gradients 和其他功能) 是建立陰影的功能。請務必瞭解 CSS 和 <canvas> 陰影之間的差異,具體如下:
CSS 使用兩種方法:box-shadow 用於方塊元素 (例如 div、span 等),text-shadow 用於文字內容。
<canvas> 有一種陰影,可用於所有向量物件,包括 ctx.moveTo、ctx.lineTo、ctx.bezierCurveTo、ctx.quadradicCurveTo、ctx.arc、ctx.rect、ctx.fillText、ctx.strokeText 等等。如要在 <canvas> 中建立陰影,請利用下列四個屬性:
- ctx.shadowColor = "red" // 字串
- 陰影的顏色;RGB、RGBA、HSL、十六進位和其他輸入值皆有效。
- ctx.shadowOffsetX = 0; // integer
- 陰影與文字的水平距離。
- ctx.shadowOffsetY = 0; // 整數
- 與文字相關的陰影垂直距離。
- ctx.shadowBlur = 10; // 整數
- 對陰影的模糊效果,值越大,模糊程度越高。
首先,讓我們看看 <canvas> 如何模擬 CSS 效果。在 Google 圖片中搜尋「css text-shadow」後,我們找到了幾個很棒的示範,可以用來模擬:Line25、立體和Shadow 3D。
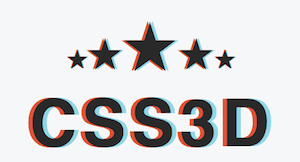
立體 3D 效果 (詳情請參閱「全像圖」) 就是一個簡單的程式碼行範例,可發揮極佳的效用。使用下列 CSS 一行,我們就能在觀看 3D 紅/青眼鏡 (觀看 3D 電影時會提供的眼鏡) 時,營造出深度錯覺:
text-shadow: -0.06em 0 0 red, 0.06em 0 0 cyan;
將這個字串轉換為 <canvas> 時,請注意以下兩點:
- 沒有陰影模糊 (第三個值),因此沒有理由實際執行陰影,因為 fillText 會產生相同的結果:
var text = "Hello world!"
ctx.fillStyle = "#000"
ctx.fillText(text, -7, 0);
ctx.fillStyle = "red"
ctx.fillText(text, 0, 0);
ctx.fillStyle = "cyan"
ctx.fillText(text, 7, 0);</pre>
<canvas>不支援 EM,因此必須將 EM 轉換為 PX。我們可以透過在 DOM 中建立具有相同字型屬性的元素,並將寬度設為要測量的格式,找出 PT、PC、EM、EX、PX 之間的轉換比例;或者,為了擷取 EM 至 PX 的轉換,我們會以「height: 1em」測量 DOM 元素,產生的 offsetHeight 會是每個 EM 中的 PX 數量。
var font = "20px sans-serif"
var d = document.createElement("span");
d.style.cssText = "font: " + font + " height: 1em; display: block"
// the value to multiply PX 's by to convert to EM 's
var EM2PX = 1 / d.offsetHeight;</pre>
避免 alpha 相乘
在較複雜的範例中 (例如 Line25 中的霓虹效果),必須使用 shadowBlur 屬性才能正確模擬效果。由於霓虹效果需要多個陰影,因此我們遇到了問題;在 <canvas> 中,每個向量物件只能有一個陰影。因此,如要繪製多個陰影,您必須在文字上方繪製多個文字版本。這會導致 Alpha 相乘,最終導致邊緣鋸齒。
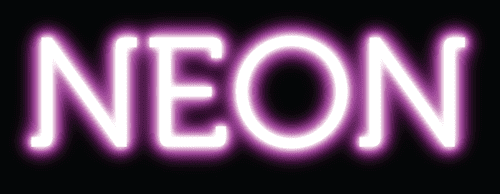
我嘗試執行 ctx.fillStyle = "rgba(0,0,0,0)" 或 "transparent" 來隱藏文字,同時顯示陰影... 不過,這項嘗試是徒勞無功的;由於陰影是 fillStyle alpha 的乘積,因此陰影永遠不會比 fillStyle 更不透明。
幸好,我們有辦法解決這個問題,我們可以從文字繪製陰影偏移,讓兩者保持分離 (因此不會重疊),進而隱藏畫面側邊的文字:
var text = "Hello world!"
var blur = 10;
var width = ctx.measureText(text).width + blur * 2;
ctx.textBaseline = "top"
ctx.shadowColor = "#000"
ctx.shadowOffsetX = width;
ctx.shadowOffsetY = 0;
ctx.shadowBlur = blur;
ctx.fillText(text, -width, 0);
裁剪文字區塊
為了稍微清理這個問題,我們可以新增裁剪路徑,避免一開始繪製 fillText (同時允許繪製陰影)。為了建立文字周圍的裁剪路徑,我們需要知道文字的高度 (稱為「em-height」,過去是印刷機上字母「M」的高度) 和文字的寬度。我們可以使用 ctx.measureText().width 取得寬度,但 ctx.measureText().height 不存在。
幸運的是,透過 CSS 駭客攻擊 (請參閱「排版計量」,瞭解如何透過 CSS 測量值修正舊版 <canvas> 的實作方式),我們可以透過測量 <span> 的 offsetHeight 來找出文字的高度,且使用相同的字體屬性:
var d = document.createElement("span");
d.font = "20px arial"
d.textContent = "Hello world!"
var emHeight = d.offsetHeight;
從這裡,我們可以建立矩形做為裁剪路徑,在移除虛設形狀的同時,將「陰影」包圍起來。
ctx.rect(0, 0, width, emHeight);
ctx.clip();
將所有元素結合,並隨時進行最佳化 - 如果陰影沒有模糊效果,可以使用 fillText 取得相同效果,這樣就不必設定裁剪遮罩:
var width = ctx.measureText(text).width;
var style = shadowStyles[text];
// add a background to the current effect
ctx.fillStyle = style.background;
ctx.fillRect(0, offsetY, ctx.canvas.width, textHeight - 1)
// parse text-shadows from css
var shadows = parseShadow(style.shadow);
// loop through the shadow collection
var n = shadows.length; while(n--) {
var shadow = shadows[n];
var totalWidth = width + shadow.blur * 2;
ctx.save();
ctx.beginPath();
ctx.rect(offsetX - shadow.blur, offsetY, offsetX + totalWidth, textHeight);
ctx.clip();
if (shadow.blur) { // just run shadow (clip text)
    ctx.shadowColor = shadow.color;
    ctx.shadowOffsetX = shadow.x + totalWidth;
    ctx.shadowOffsetY = shadow.y;
    ctx.shadowBlur = shadow.blur;
    ctx.fillText(text, -totalWidth + offsetX, offsetY + metrics.top);
} else { // just run pseudo-shadow
    ctx.fillStyle = shadow.color;
    ctx.fillText(text, offsetX + (shadow.x||0), offsetY - (shadow.y||0) + metrics.top);
}
ctx.restore();
}
// drawing the text in the foreground
if (style.color) {
ctx.fillStyle = style.color;
ctx.fillText(text, offsetX, offsetY + metrics.top);
}
// jump to next em-line
ctx.translate(0, textHeight);
由於您不會想要手動輸入所有 <canvas> 指令,因此我在示範來源中加入了簡單的文字陰影剖析器,這樣您就可以提供 CSS 指令,並讓剖析器產生 <canvas> 指令。如今,我們的 <canvas> 元素可連結至各種樣式。這些相同的陰影效果可用於任何向量物件,從 Web 字體到從 SVG 匯入的複雜圖形,以及產生向量圖形等等!

插播 (關於推送像素的附帶說明)
在撰寫這篇文章的這一節時,我對立體影像示例感到好奇。使用 <canvas> 和兩張從略微不同角度拍攝的圖片,建立 3D 電影螢幕效果有多困難?看來也不太難。下列核函式會將第一張圖片 (data) 的紅色通道與第二張圖片 (data2) 的青色通道合併:
data[i] = data[i] * 255 / 0xFF;
data[i+1] = 255 * data2[i+1] / 0xFF;
data[i+2] = 255 * data2[i+2] / 0xFF;
只要將兩部 iPhone 貼在額頭上,同時按下「錄影」按鈕,就能使用 HTML5 製作出 3D 電影。有沒有人自願?

霓虹彩虹、斑馬反射效果串連
在 <canvas> 中連結多個效果可能很簡單,但您必須具備 globalCompositeOperation (GCO) 的基本知識。如要比較與 GIMP (或 Photoshop) 的運算:<canvas>
darker 有 12 個 GCO,而 lighter 可視為圖層混合模式;其他 10 個運算會以 Alpha 遮罩形式套用至圖層 (一個圖層會移除另一個圖層的像素)。globalCompositeOperation 會將「圖層」(或在本例中為程式碼字串) 綁定在一起,以全新且令人興奮的方式進行組合:
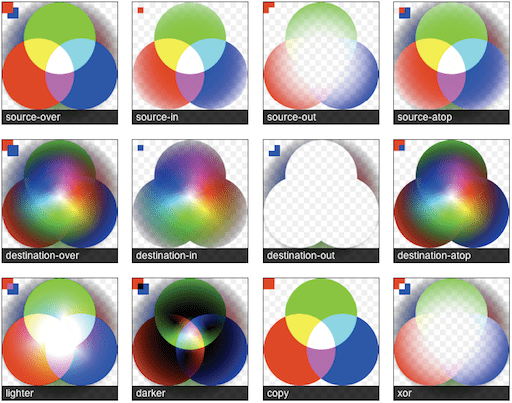
globalCompositeOperation 圖表會顯示 GCO 模式的運作情形;這張圖表會使用大量的色彩光譜和多個 Alpha 透明度層級,以便詳細查看預期結果。建議您查看 Mozilla 的 globalCompositeOperation 參考資料,瞭解文字說明。如要進一步研究,您可以參考 Porter Duff 的數位影像合成一文,瞭解這項運算的運作方式。
我最喜歡的模式是 globalCompositeOperation="lighter"。較淺的顏色會將附加的像素混合,類似光線混合的方式;當紅色、綠色和白色光線都處於全亮度時,我們會看到白光。這項功能非常有趣,尤其是當 <canvas> 設為低 globalAlpha 時,您可以更精細地控制邊緣,讓邊緣更平滑。Lighter 的用途非常廣泛,我最近最喜歡的應用程式是 HTML5 桌面背景製作工具,網址為 http://weavesilk.com/。我的其中一個示範「呼吸星系」 (JS1k) 也使用較輕量模式,您可以透過這兩個範例的繪圖模式,瞭解這個模式產生的效果。
globalCompositeOperation 瀏覽器處理方式。
霓虹彩虹抖動效果
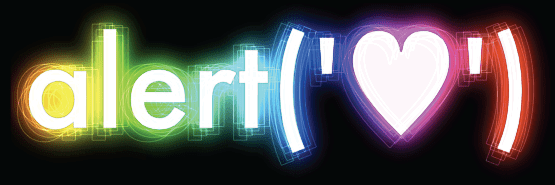
在以下示範中,我們將使用 globalCompositeOperation (source-in、lighter 和 darker) 連結效果,以產生 類似 Photoshop 的霓虹彩虹光效果,並加上抖動邊框。這個示範是「<canvas> 中的文字陰影」示範的進階版,使用相同的策略將陰影與文字分開 (請參閱上一節):
function neonLightEffect() {
var text = "alert('"+String.fromCharCode(0x2665)+"')";
var font = "120px Futura, Helvetica, sans-serif";
var jitter = 25; // the distance of the maximum jitter
var offsetX = 30;
var offsetY = 70;
var blur = getBlurValue(100);
// save state
ctx.save();
ctx.font = font;
// calculate width + height of text-block
var metrics = getMetrics(text, font);
// create clipping mask around text-effect
ctx.rect(offsetX - blur/2, offsetY - blur/2,
        offsetX + metrics.width + blur, metrics.height + blur);
ctx.clip();
// create shadow-blur to mask rainbow onto (since shadowColor doesn't accept gradients)
ctx.save();
ctx.fillStyle = "#fff";
ctx.shadowColor = "rgba(0,0,0,1)";
ctx.shadowOffsetX = metrics.width + blur;
ctx.shadowOffsetY = 0;
ctx.shadowBlur = blur;
ctx.fillText(text, -metrics.width + offsetX - blur, offsetY + metrics.top);
ctx.restore();
// create the rainbow linear-gradient
var gradient = ctx.createLinearGradient(0, 0, metrics.width, 0);
gradient.addColorStop(0, "rgba(255, 0, 0, 1)");
gradient.addColorStop(0.15, "rgba(255, 255, 0, 1)");
gradient.addColorStop(0.3, "rgba(0, 255, 0, 1)");
gradient.addColorStop(0.5, "rgba(0, 255, 255, 1)");
gradient.addColorStop(0.65, "rgba(0, 0, 255, 1)");
gradient.addColorStop(0.8, "rgba(255, 0, 255, 1)");
gradient.addColorStop(1, "rgba(255, 0, 0, 1)");
// change composite so source is applied within the shadow-blur
ctx.globalCompositeOperation = "source-atop";
// apply gradient to shadow-blur
ctx.fillStyle = gradient;
ctx.fillRect(offsetX - jitter/2, offsetY,
            metrics.width + offsetX, metrics.height + offsetY);
// change composite to mix as light
ctx.globalCompositeOperation = "lighter";
// multiply the layer
ctx.globalAlpha = 0.7
ctx.drawImage(ctx.canvas, 0, 0);
ctx.drawImage(ctx.canvas, 0, 0);
ctx.globalAlpha = 1
// draw white-text ontop of glow
ctx.fillStyle = "rgba(255,255,255,0.95)";
ctx.fillText(text, offsetX, offsetY + metrics.top);
// created jittered stroke
ctx.lineWidth = 0.80;
ctx.strokeStyle = "rgba(255,255,255,0.25)";
var i = 10; while(i--) {
    var left = jitter / 2 - Math.random() * jitter;
    var top = jitter / 2 - Math.random() * jitter;
    ctx.strokeText(text, left + offsetX, top + offsetY + metrics.top);
}
ctx.strokeStyle = "rgba(0,0,0,0.20)";
ctx.strokeText(text, offsetX, offsetY + metrics.top);
ctx.restore();
};
斑馬反射效果
斑馬反射效果的靈感來自 WebDesignerWall 的優質資源,說明如何使用 CSS 為網頁增添色彩。這項功能可進一步實現這個概念,為文字建立「反射」效果,例如 iTunes 中顯示的內容。效果結合了 fillColor (白色)、createPattern (zebra.png) 和 linearGradient (閃亮),說明您可以為每個向量物件套用多種填滿類型:

function sleekZebraEffect() {
// inspired by - http://www.webdesignerwall.com/demo/css-gradient-text/
var text = "Sleek Zebra...";
var font = "100px Futura, Helvetica, sans-serif";

// save state
ctx.save();
ctx.font = font;

// getMetrics calculates:
// width + height of text-block
// top + middle + bottom baseline
var metrics = getMetrics(text, font);
var offsetRefectionY = -20;
var offsetY = 70;
var offsetX = 60;

// throwing a linear-gradient in to shine up the text
var gradient = ctx.createLinearGradient(0, offsetY, 0, metrics.height + offsetY);
gradient.addColorStop(0.1, '#000');
gradient.addColorStop(0.35, '#fff');
gradient.addColorStop(0.65, '#fff');
gradient.addColorStop(1.0, '#000');
ctx.fillStyle = gradient
ctx.fillText(text, offsetX, offsetY + metrics.top);

// draw reflected text
ctx.save();
ctx.globalCompositeOperation = "source-over";
ctx.translate(0, metrics.height + offsetRefectionY)
ctx.scale(1, -1);
ctx.font = font;
ctx.fillStyle = "#fff";
ctx.fillText(text, offsetX, -metrics.height - offsetY + metrics.top);
ctx.scale(1, -1);

// cut the gradient out of the reflected text
ctx.globalCompositeOperation = "destination-out";
var gradient = ctx.createLinearGradient(0, offsetY, 0, metrics.height + offsetY);
gradient.addColorStop(0.0, 'rgba(0,0,0,0.65)');
gradient.addColorStop(1.0, '#000');
ctx.fillStyle = gradient;
ctx.fillRect(offsetX, offsetY, metrics.width, metrics.height);

// restore back to original transform state
ctx.restore();

// using source-atop to allow the transparent .png to show through to the gradient
ctx.globalCompositeOperation = "source-atop";

// creating pattern from <image> sourced.
ctx.fillStyle = ctx.createPattern(image, 'repeat');

// fill the height of two em-boxes, to encompass both normal and reflected state
ctx.fillRect(offsetX, offsetY, metrics.width, metrics.height * 2);
ctx.restore();
};
Canvas 中的內/外陰影
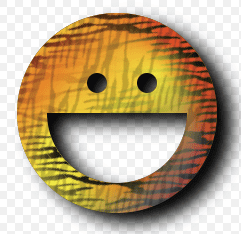
<canvas> 規格並未提及「內」與「外」陰影的議題。事實上,一開始您可能會認為「內部」陰影不受支援。但事實並非如此。只是啟用方式稍微複雜一點而已 ;) 如同 F1LT3R 在最近的文章中所述,您可以使用順時針和逆時針的迴轉規則獨特屬性,建立內陰影。如要這麼做,您可以繪製容器矩形來建立「內陰影」,然後使用相反的迴轉規則繪製裁剪形狀,也就是建立形狀的反向。
以下範例允許同時使用顏色+漸層+圖案為內陰影和 fillStyle 設定樣式。您可以個別指定圖案旋轉角度;請注意,斑馬紋現在是垂直排列。使用與邊界框大小相同的裁剪遮罩,不必使用超大型容器來包圍裁剪形狀,藉此避免處理陰影的不必要部分,進而提升速度。
function innerShadow() {

function drawShape() { // draw anti-clockwise
ctx.arc(0, 0, 100, 0, Math.PI * 2, true); // Outer circle
ctx.moveTo(70, 0);
ctx.arc(0, 0, 70, 0, Math.PI, false); // Mouth
ctx.moveTo(-20, -20);
ctx.arc(30, -30, 10, 0, Math.PI * 2, false); // Left eye
ctx.moveTo(140, 70);
ctx.arc(-20, -30, 10, 0, Math.PI * 2, false); // Right eye
};

var width = 200;
var offset = width + 50;
var innerColor = "rgba(0,0,0,1)";
var outerColor = "rgba(0,0,0,1)";

ctx.translate(150, 170);

// apply inner-shadow
ctx.save();
ctx.fillStyle = "#000";
ctx.shadowColor = innerColor;
ctx.shadowBlur = getBlurValue(120);
ctx.shadowOffsetX = -15;
ctx.shadowOffsetY = 15;

// create clipping path (around blur + shape, preventing outer-rect blurring)
ctx.beginPath();
ctx.rect(-offset/2, -offset/2, offset, offset);
ctx.clip();

// apply inner-shadow (w/ clockwise vs. anti-clockwise cutout)
ctx.beginPath();
ctx.rect(-offset/2, -offset/2, offset, offset);
drawShape();
ctx.fill();
ctx.restore();

// cutout temporary rectangle used to create inner-shadow
ctx.globalCompositeOperation = "destination-out";
ctx.fill();

// prepare vector paths
ctx.beginPath();
drawShape();

// apply fill-gradient to inner-shadow
ctx.save();
ctx.globalCompositeOperation = "source-in";
var gradient = ctx.createLinearGradient(-offset/2, 0, offset/2, 0);
gradient.addColorStop(0.3, '#ff0');
gradient.addColorStop(0.7, '#f00');
ctx.fillStyle = gradient;
ctx.fill();

// apply fill-pattern to inner-shadow
ctx.globalCompositeOperation = "source-atop";
ctx.globalAlpha = 1;
ctx.rotate(0.9);
ctx.fillStyle = ctx.createPattern(image, 'repeat');
ctx.fill();
ctx.restore();

// apply fill-gradient
ctx.save();
ctx.globalCompositeOperation = "destination-over";
var gradient = ctx.createLinearGradient(-offset/2, -offset/2, offset/2, offset/2);
gradient.addColorStop(0.1, '#f00');
gradient.addColorStop(0.5, 'rgba(255,255,0,1)');
gradient.addColorStop(1.0, '#00f');
ctx.fillStyle = gradient
ctx.fill();

// apply fill-pattern
ctx.globalCompositeOperation = "source-atop";
ctx.globalAlpha = 0.2;
ctx.rotate(-0.4);
ctx.fillStyle = ctx.createPattern(image, 'repeat');
ctx.fill();
ctx.restore();

// apply outer-shadow (color-only without temporary layer)
ctx.globalCompositeOperation = "destination-over";
ctx.shadowColor = outerColor;
ctx.shadowBlur = 40;
ctx.shadowOffsetX = 15;
ctx.shadowOffsetY = 10;
ctx.fillStyle = "#fff";
ctx.fill();
};
從這些範例中,您可以瞭解使用 globalCompositeOperation 時,我們可以將效果鏈結在一起,產生更精細的效果 (利用遮罩和混合)。螢幕就是你的寶貝 ;)
Spaceage:生成式特效
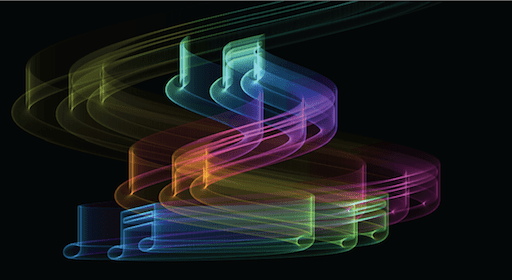
在 <canvas> 中,從 Unicode 字元 0x2708 開始:
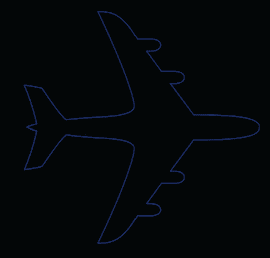
…變成以下陰影範例:
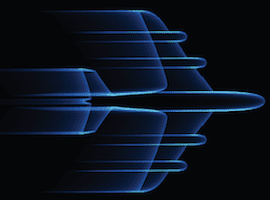
…可以透過多次呼叫 ctx.strokeText() 並使用較細的 lineWidth (0.25) 來實現,同時緩慢減少 x 偏移和 alpha,讓向量元素產生動態感。
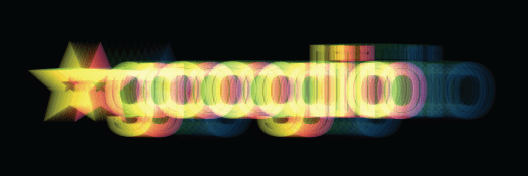
將元素 XY 位置對應至正弦/餘弦波,並使用 HSL 屬性循環變換顏色,即可創造出更有趣的效果,例如這個「生物危害」示例:

HSL:色調、飽和度、亮度 (1978 年)
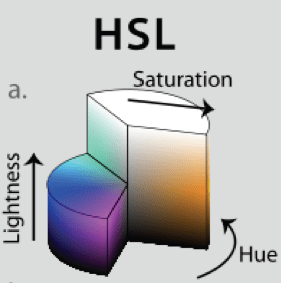
CSS3 規格新支援的格式為 HSL。在 HEX 是為電腦設計的情況下,HSL 則是為了人類可讀而設計。
為了說明 HSL 的簡易性,我們會從 360 開始增加「色調」,並以圓柱體方式將色調對應至色譜。亮度會控制顏色的深淺程度;0% 表示黑色像素,100% 表示白色像素。飽和度可控制顏色的亮度或鮮豔度;飽和度為 0% 時會產生灰色,飽和度為 100% 時會產生鮮豔的顏色。
由於 HSL 是近期的標準,您可能會想要繼續支援舊版瀏覽器,這可以透過色彩空間轉換來實現。以下程式碼會接受 HSL 物件 { H: 360, S: 100, L: 100},並輸出 RGB 物件 { R: 255, G: 255, B: 255 }。您可以使用這些值建立 rgb 或 rgba 字串。如需更深入的資訊,請參閱維基百科上有關 HSL 的文章。
// HSL (1978) = H: Hue / S: Saturation / L: Lightness
HSL_RGB = function (o) { // { H: 0-360, S: 0-100, L: 0-100 }
var H = o.H / 360,
    S = o.S / 100,
    L = o.L / 100,
    R, G, B, _1, _2;

function Hue_2_RGB(v1, v2, vH) {
if (vH < 0) vH += 1;
if (vH > 1) vH -= 1;
if ((6 * vH) < 1) return v1 + (v2 - v1) * 6 * vH;
if ((2 * vH) < 1) return v2;
if ((3 * vH) < 2) return v1 + (v2 - v1) * ((2 / 3) - vH) * 6;
return v1;
}

if (S == 0) { // HSL from 0 to 1
R = L * 255;
G = L * 255;
B = L * 255;
} else {
if (L < 0.5) {
    _2 = L * (1 + S);
} else {
    _2 = (L + S) - (S * L);
}
_1 = 2 * L - _2;

R = 255 * Hue_2_RGB(_1, _2, H + (1 / 3));
G = 255 * Hue_2_RGB(_1, _2, H);
B = 255 * Hue_2_RGB(_1, _2, H - (1 / 3));
}

return {
R: R,
G: G,
B: B
};
};
使用 requestAnimationFrame 建立動畫
過去,如果要在 JavaScript 中建立動畫,有兩個選擇:setTimeout 和 setInterval。
window.requestAnimationFrame 是取代這兩者的新標準;讓瀏覽器根據可用資源調整動畫,進而節省全球電力 (並減少電腦的幾個心跳)。部分重要功能包括:
- 當使用者離開畫面時,動畫會減速或完全停止,以免使用不必要的資源。
- 影格速率上限為 60FPS。這是因為這遠遠超過人類可察覺的程度 (大多數人會認為 30 FPS 的動畫「流暢」)。
在撰寫本文時,必須使用供應商專屬前置字元才能使用 requestAnimationFrame。Paul Irish 在requestAnimationFrame 為智慧動畫中建立了支援跨供應商的墊片層:
// shim layer with setTimeout fallback
window.requestAnimFrame = (function(){
return  window.requestAnimationFrame       ||
        window.webkitRequestAnimationFrame ||
        window.mozRequestAnimationFrame    ||
        window.oRequestAnimationFrame      ||
        window.msRequestAnimationFrame     ||
        function(/* function */ callback, /* DOMElement */ element){
        window.setTimeout(callback, 1000 / 60);
        };
})();
進一步來說,如果您更有野心,不妨將這項功能與 requestAnimationFrame.js 等多邊形填充功能結合,這樣一來,您就能在切換至新標準的同時,進一步支援舊版瀏覽器。requestAnimationFrame.js 有幾項功能需要進一步調整。
(function animate() {
var i = 50;
while(i--) {
    if (n > endpos) return;

    n += definition;
    ctx.globalAlpha = (0.5 - (n + startpos) / endpos) * alpha;
    if (doColorCycle) {
        hue = n + color;
        ctx.strokeStyle = "hsl(" + (hue % 360) + ",99%,50%)"; // iterate hue
    }
    var x = cos(n / cosdiv) * n * cosmult; // cosine
    var y = sin(n / sindiv) * n * sinmult; // sin
    ctx.strokeText(text, x + xoffset, y + yoffset); // draw rainbow text
}
timeout = window.requestAnimationFrame(animate, 0);
})();

原始碼
有了各瀏覽器供應商的支援,<canvas> 的未來無疑是明確的,可以使用 PhoneGap 移植至 iPhone/Android/電腦執行檔,或

