
提供簡單易用的互動體驗。

如果他們從未需要這樣做,又該怎麼辦?如果使用者可以將手機相機對準包裝上的 UPC 代碼,然後網站顯示正確的墨水匣和大大的紅色「重新訂購」按鈕,那麼情況會如何呢?
請想想其他在網站上使用攝影機的方式。假設有個網站支援店內價格查詢功能。假設您想取得博物館展覽或歷史標記的相關資訊。想像一下,在遊戲中找出真實世界地標,例如地理代碼遊戲或尋寶遊戲。
Web Perception Toolkit 可實現這些以攝影機為基礎的情況。在某些情況下,您甚至可以不必編寫程式碼,就能建立體驗。
運作方式
開放原始碼的 Web Perception Toolkit 可協助您在網站中加入視覺搜尋功能。這項服務會將裝置相機串流傳送至一組偵測器,這些偵測器會將實際物體 (在此稱為「目標」) 對應至網站上的內容。這項對應關係是使用網站上的結構化資料 (JSON-LD) 定義。有了這項資料,您就能在可自訂的 UI 中呈現正確的資訊。
我會展示足夠的內容,讓您瞭解這項功能的運作方式。如需完整說明,請參閱開始使用指南、工具包參考資料、I/O Sandbox 示範和示範。
結構化資料
工具包無法在攝影機畫面中找到任何目標。您必須為要辨識的目標提供連結 JSON 資料。這項資料也包含將向使用者顯示的目標相關資訊。
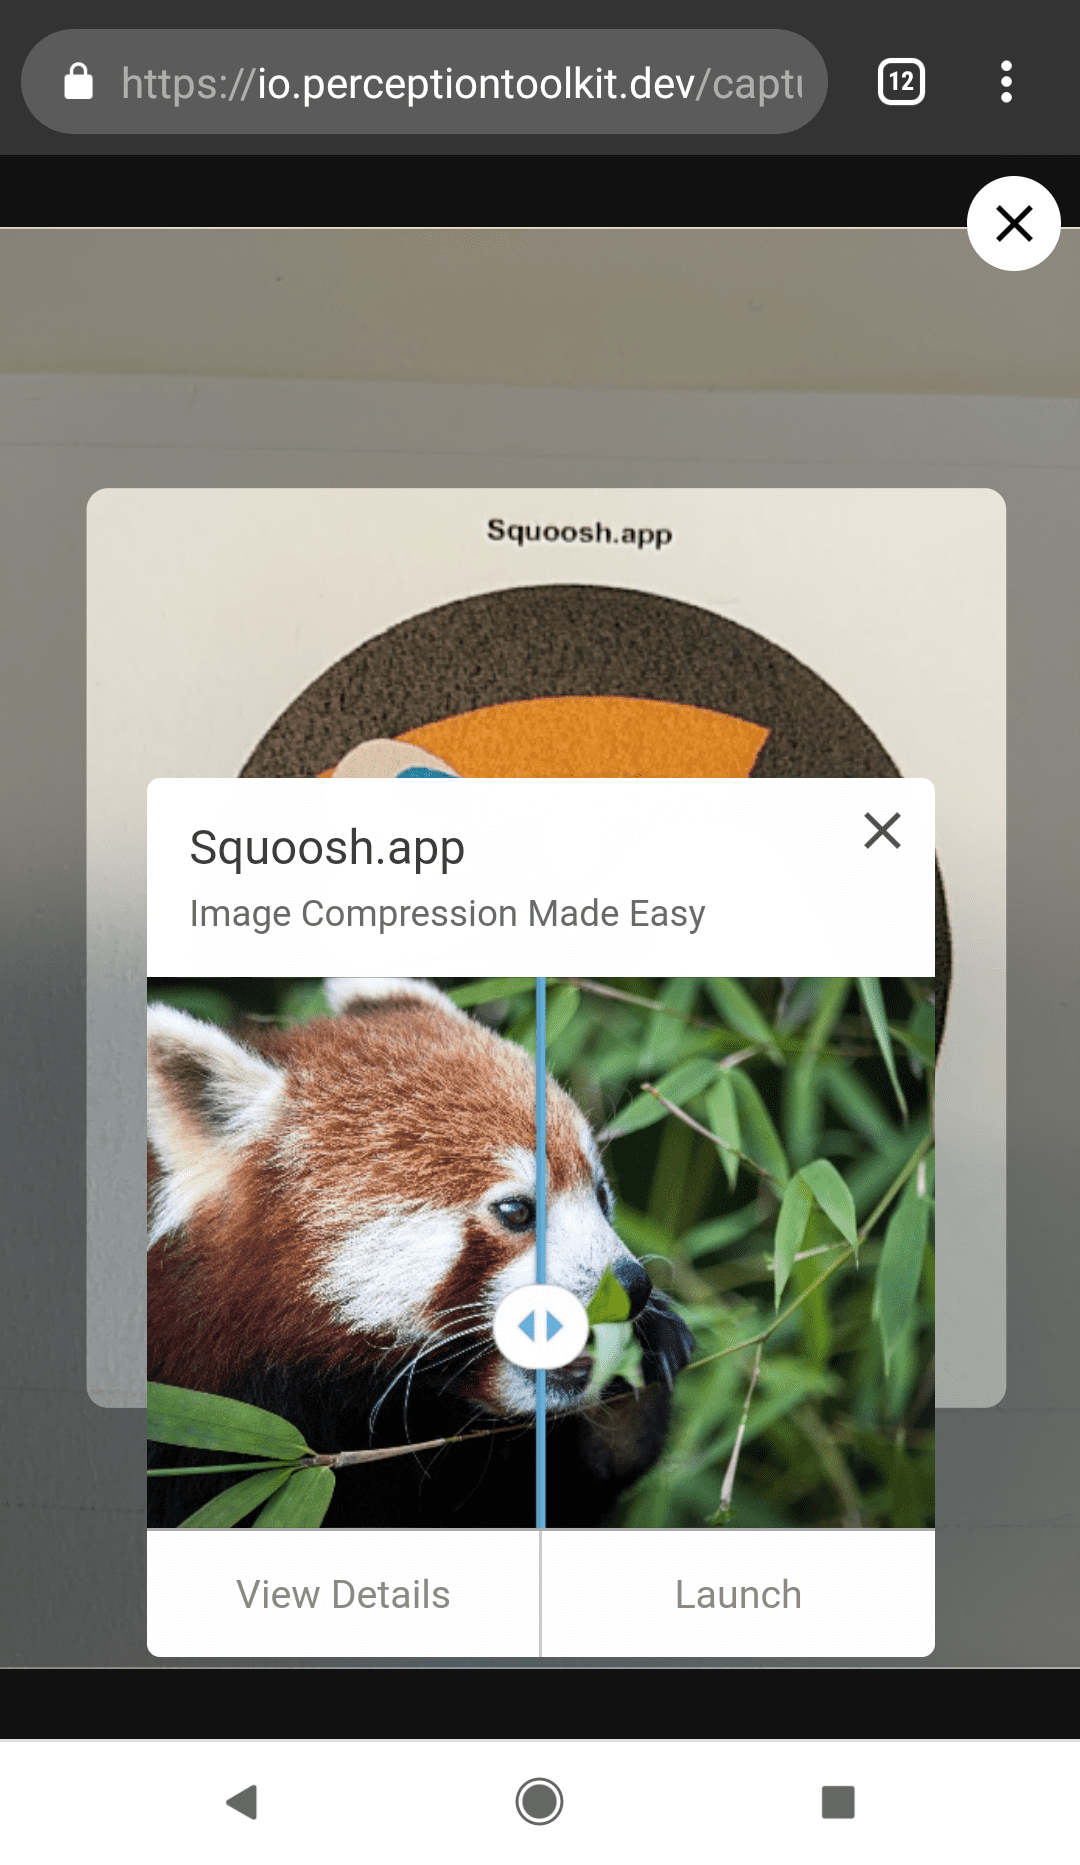
您只需這些資料,就能打造下圖所示的使用者體驗。如果您不採取其他行動,Web Perception Toolkit 可以識別目標,然後根據資料中提供的資訊顯示及隱藏資訊卡。請使用我們的構件映射示範親自試試。
使用 JSON 連結資料檔案,透過 <script> 標記和 "application/ld+json" MIME 類型,將資料新增至網站。
<script type="application/ld+json" src="//path/to/your/sitemap.jsonld">
檔案本身的內容如下所示:
[
  {
    "@context": "https://schema.googleapis.com/",
    "@type": "ARArtifact",
    "arTarget": {
      "@type": "Barcode",
      "text": "012345678912"
    },
    "arContent": {
      "@type": "WebPage",
      "url": "http://localhost:8080/demo/artifact-map/products/product1.html",
      "name": "Product 1",
      "description": "This is a product with a barcode",
      "image": "http://localhost:8080/demo/artifact-map/products/product1.png"
    }
  }
]
使用者體驗
如果您想要提供比預設使用者體驗更豐富的體驗,此工具包提供生命週期事件、資訊卡和按鈕物件,可用於打造圍繞這些事件的使用者體驗,並提供簡單的方式為資訊卡設定樣式。我將使用程式碼稍微示範這項功能,並大致遵循「開始使用」指南。
最重要的生命週期事件是 PerceivedResults,每次找到目標時就會觸發。目標可以是實體物件或標記,例如條碼或 QR code。
回應這項事件的程序與其他事件相同,但有例外狀況。如果您未導入事件,系統會使用結構化資料自動建立使用者介面。如要覆寫這項行為,請呼叫 event.preventDefault() 來啟動事件處理常式。
const container = document.querySelector('.container');
async function onPerceivedResults(event) {
  // preventDefault() to stop default result Card from showing.
  event.preventDefault();
  // Process the event.
}
window.addEventListener(PerceptionToolkit.Events.PerceivedResults, onPerceivedResults);
讓我們進一步瞭解事件。事件本身包含找到和遺失的標記和目標陣列。在世界中找到目標時,事件會觸發並在 event.found 中傳遞所找到的物件。同樣地,當目標從攝影機檢視畫面中移除時,事件也會再次觸發,並在 event.lost 中傳遞遺失的物件。這有助於考量手部和標記的移動情形:相機未握得夠穩、標記掉落等。
async function onPerceivedResults(event) {
  // preventDefault() to stop default result Card from showing
  event.preventDefault();
  if (container.childNodes.length > 0) { return; }
  const { found, lost } = event.detail;
  // Deal with lost and found objects.
}
接著,您可以根據工具包找到的內容,顯示適當的資訊卡。
async function onPerceivedResults(event) {
  event.preventDefault();
  if (container.childNodes.length > 0) { return; }
  const { found, lost } = event.detail;
  if (found.length === 0 && lost.length === 0) {
    // Object not found.
    // Show a card with an offer to show the catalog.
  } else if (found.length > 0) {
    // Object found.
    // Show a card with a reorder button.
  }
}
新增卡片和按鈕只需將其例項化,並附加至父項物件即可。例如:
const { Card } = PerceptionToolkit.Elements;
const card = new Card();
card.src = 'Your message here.'
container.appendChild(card)'
最後,整個畫面會顯示如下。請注意,我已為使用者體驗新增便利功能。無論是否找到標記,我都會提供一鍵存取功能,讓您在當下取得我認為最實用的資訊。
async function onPerceivedResults(event) {
  // preventDefault() to stop default result Card from showing
  event.preventDefault();
  if (container.childNodes.length > 0) { return; }
  const { found, lost } = event.detail;
  const { ActionButton, Card } = PerceptionToolkit.Elements;
  if (found.length === 0 && lost.length === 0) {
    //Make a view catalog button.
    const button =  new ActionButton();
    button.label = 'View catalog';
    button.addEventListener('click', () => {
      card.close();
      //Run code to launch a catalog.
    });
    //Make a card for the button.
    const card = new Card();
    card.src = 'We wish we could help, but that\'s not our razor. Would you like to see our catalog?';
    card.appendChild(button);
    //Tell the toolkit it does not keep the card around
    // if it finds something it recognizes.
    card.dataset.notRecognized = true;
    container.appendChild(card);
  } else if (found.length > 0) {
    //Make a reorder button.
    const button = new ActionButton();
    button.label = 'Reorder';
    botton.addEventListener('click', () => {
      card.close();
      //Run code to reorder.
    })
    const card = new Card();
    card.src = found[0].content;
    card.appendChild(button);
    container.appendChild(card);
  }
}
資訊卡格式設定
Web Perception Toolkit 會為資訊卡和按鈕提供內建格式,並使用預設樣式表格。但您可以輕鬆新增自己的圖片。提供的 Card 和 ActionButton 物件包含 style 屬性 (以及許多其他屬性),可讓您為外觀和風格加上組織的印記。如要加入預設樣式表,請在頁面中加入 <link> 元素。
<link rel="stylesheet" href="//path/to/toolkit/styles/perception-toolkit.css">
結論
如同我在文章開頭所述,這並非 Web Perception 工具包的完整介紹。希望這能讓您瞭解在網站中新增視覺搜尋功能有多簡單。請參閱入門指南和示範影片,進一步瞭解相關資訊。請參閱工具包說明文件,瞭解工具包的功能。