You've done hard work to get fast, now make sure you stay fast by automating performance testing with Lighthouse Bot.
Lighthouse grades your app in 5 categories, and one of those is performance. While you could try to remember to monitor performance changes with DevTools or Lighthouse CLI every time you edit your code, you don't have to do that. Tools can do the tedious stuff for you. Travis CI is a great service that automatically runs tests for your app in the cloud every time you push new code.
Lighthouse Bot integrates with Travis CI, and its performance budget feature ensures that you won't accidentally downgrade performance without noticing. You can configure your repository so that it won't allow merging pull-requests if the Lighthouse scores fall below the threshold you've set (e.g. < 96/100).
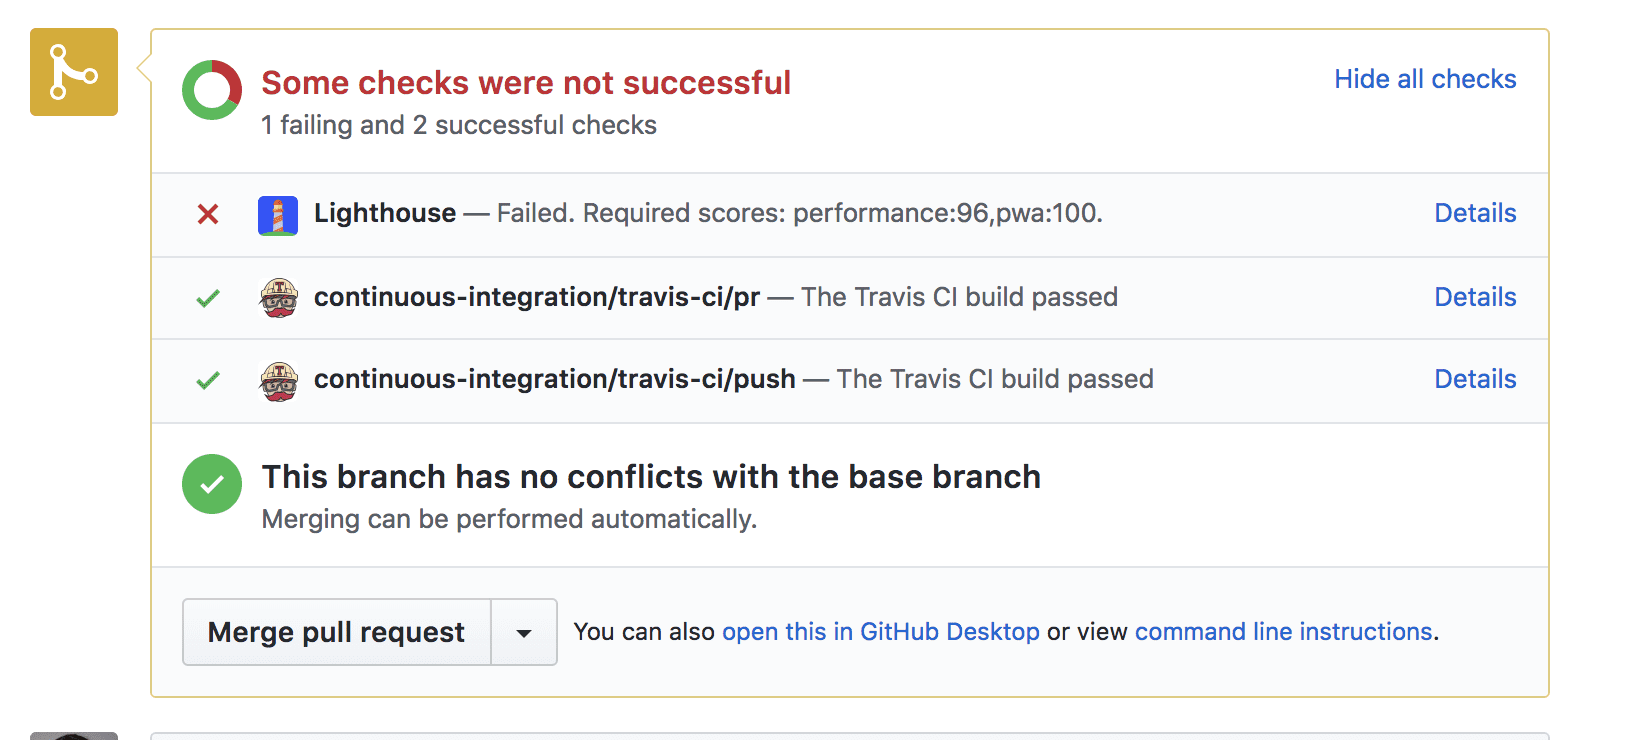
Although you can test performance on localhost, your site will often perform differently on live servers. To get a more realistic picture, it's best to deploy your site to a staging server. You can use any hosting service; this guide will take Firebase hosting for a spin.
1. Setup
This simple app helps you sort three numbers.
Clone the example from GitHub, and make sure to add it as a repository on your GitHub account.
2. Deploy to Firebase
To get started, you'll need a Firebase account. Once you've taken care of that, create a new project in the Firebase console by clicking "Add project":

Deploying to Firebase
You'll need Firebase CLI to deploy the app. Even if you already have it installed, it's good practice to frequently update the CLI to the latest version with this command:
npm install -g firebase-tools
To authorize the Firebase CLI, run:
firebase login
Now initialize the project:
firebase init
The console will ask you a series of questions during setup:
- When prompted to select features, choose "Hosting."
- For the default Firebase project, select the project that you've created in the Firebase console.
- Type in "public" as your public directory.
- Type "N" (no) to configuring as a single-page app.
This process creates a firebase.json configuration file in the root of your
project directory.
Congrats, you're ready to deploy! Run:
firebase deploy
In a split second, you'll have a live app.
3. Setting up Travis
You'll need to register an account on Travis and then activate GitHub Apps integration under the Settings section of your profile.
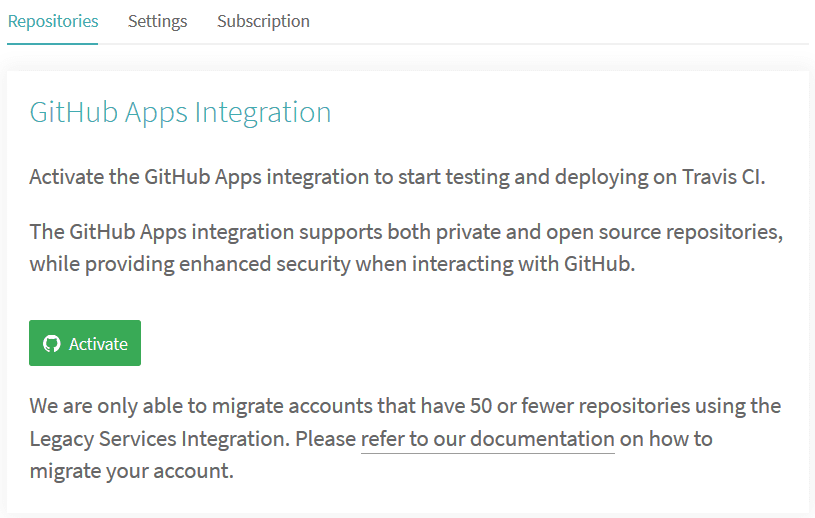
Once you have an account
Go to Settings under your profile, hit the Sync account button, and make sure your project repo is listed on Travis.

To kick-off continuous integration, you need two things:
- To have a
.travis.ymlfile in the root directory - To trigger a build by doing a regular old git push
The lighthouse-bot-starter repo already has a .travis.yml YAML file:
language: node_js
node_js:
  - "8.1.3"
install:
  - npm install
before_script:
  - npm install -g firebase-tools
script:
  - webpack
The YAML file tells Travis to install all the dependencies and build your app. Now it's your turn to push the example app to your own GitHub repository. If you haven't already, run the following command:
git push origin main
Click on your repo under Settings in Travis to see your project's Travis dashboard. If everything is cool, you'll see your build go from yellow to green in a couple of minutes. 🎉
4. Automate Firebase deployment with Travis
In Step 2, you logged into your Firebase account and deployed the app from the
command line with firebase deploy. In order for Travis to deploy your app to
Firebase, you have to authorize it. How do you do that? With a Firebase token.
🗝️🔥
Authorize Firebase
To generate the token run this command:
firebase login:ci
It will open a new tab in a browser window so that Firebase can verify you. After that, look back at the console, and you'll see your freshly minted token. Copy it and go back to Travis.
In your project's Travis dashboard, go to More options > Settings > Environment variables.

Paste the token in the value field, name the variable FIREBASE_TOKEN, and add it.
Add deployment to your Travis setup
You need the following lines to tell Travis to deploy the app after every successful build.
Add them to the end of the .travis.yml file. 🔚
after_success:
  - firebase deploy --token $FIREBASE_TOKEN --non-interactive
Push this change to GitHub and wait for your first automated deployment. If you take a look at your Travis log, it should soon say ✔️ Deploy complete!
Now whenever you make changes to your app, they will be automatically deployed to Firebase.
5. Setting up Lighthouse Bot
Friendly Lighthouse Bot updates you on your app's Lighthouse scores. It just needs an invitation to your repo.
On GitHub, go to your project's settings and add "lighthousebot" as a collaborator (Settings>Collaborators):
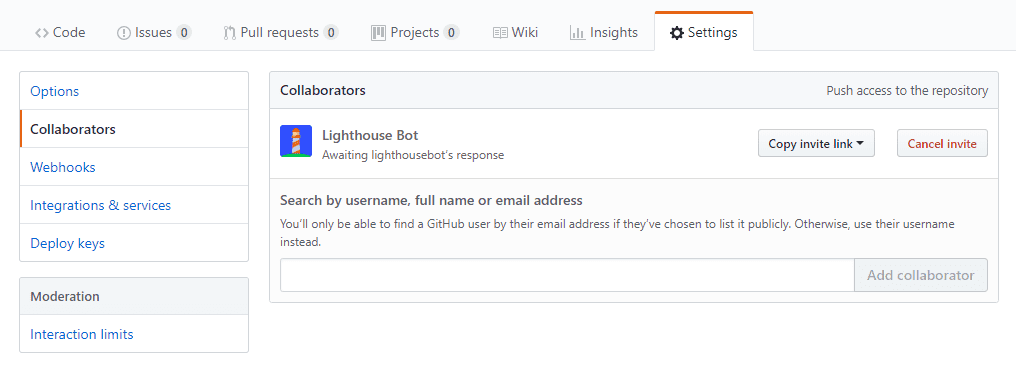
Approving these requests is a manual process so they don't always happen instantly. Before you start testing, make sure lighthousebot has approved its collaborator status. In the meantime, you also need to add another key to your project's environment variables on Travis. Leave your email here, and you'll get a Lighthouse Bot key in your inbox. 📬
On Travis, add this key as an environment variable and name it LIGHTHOUSE_API_KEY:

Add Lighthouse Bot to your project
Next, add Lighthouse Bot to your project by running:
npm i --save-dev https://github.com/ebidel/lighthousebot
And add this bit to the package.json:
"scripts": {
  "lh": "lighthousebot"
}
Add Lighthouse Bot to your Travis configuration
For the final trick, test the performance of the app after every pull request!
In .travis.yml add another step in after_success:
after_success:
  - firebase deploy --token $FIREBASE_TOKEN --non-interactive
  - npm run lh -- https://staging.example.com
It will run a Lighthouse audit on the given URL, so replace
https://staging.example.com with the URL of your app
(that's your-app-123.firebaseapp.com).
Set your standards high and tweak the setup so you don't accept any changes to the app that bring the performance score below 95:
- npm run lh -- --perf=95 https://staging.example.com
Make a pull request to trigger Lighthouse Bot test on Travis
Lighthouse Bot will only test pull requests, so if you push to the main branch now, you'll just get "This script can only be run on Travis PR requests" in your Travis log.
To trigger the Lighthouse Bot test:
- Checkout a new branch
- Push it to GitHub
- Make a pull request
Hang tight on that pull request page and wait for Lighthouse Bot to sing! 🎤
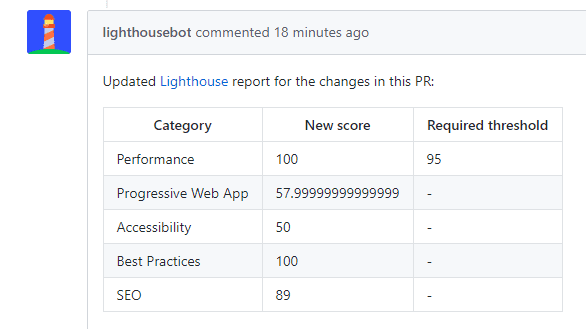
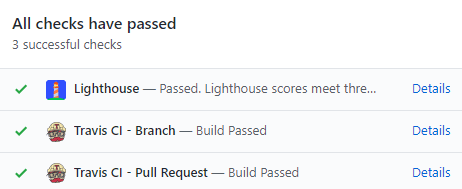
The performance score is great, the app is under budget, and the check has passed!
More Lighthouse options
Remember how Lighthouse tests 5 different categories? You can enforce scores for any of those with Lighthouse Bot flags:
--perf  # performance
--pwa   # progressive web app score
--a11y  # accessibility score
--bp    # best practices score
--seo   # SEO score
Example:
npm run lh -- --perf=93 --seo=100 https://staging.example.com
This will fail the PR if the performance score drops below 93 or the SEO score drops below 100.
You can also choose not to get Lighthouse Bot's comments with the --no-comment
option.

