등록 및 로그인 양식을 최대한 간단하게 유지하세요.
사용자가 다시 방문할 때 다시 로그인하지 않아도 되도록 로그인 양식의 사용자 인증 정보를 저장합니다.
양식의 사용자 인증 정보를 저장하려면 다음 단계를 따르세요.
- 양식에
autocomplete를 포함합니다. - 양식이 제출되지 않도록 합니다.
- 요청을 전송하여 인증합니다.
- 사용자 인증 정보를 저장합니다.
- UI를 업데이트하거나 맞춤 페이지로 이동합니다.
양식에 autocomplete 포함
계속하기 전에 양식에 autocomplete 속성이 포함되어 있는지 확인합니다.
이렇게 하면 Credential Management API가 양식에서 id 및 password를 찾아 사용자 인증 정보 객체를 구성하는 데 도움이 됩니다.
또한 인증 관리 API를 지원하지 않는 브라우저에서 API의 시맨틱스를 이해하는 데도 도움이 됩니다. 제이슨 그리그스비의 이 도움말에서 자동 완성에 대해 자세히 알아보세요.
<form id="signup" method="post">
  <input name="email" type="text" autocomplete="username email" />
  <input name="display-name" type="text" autocomplete="name" />
  <input name="password" type="password" autocomplete="new-password" />
  <input type="submit" value="Sign Up!" />
</form>
양식 제출 방지
사용자가 제출 버튼을 누르면 양식이 제출되지 않도록 합니다. 그렇지 않으면 페이지 전환이 발생합니다.
    var f = document.querySelector('#signup');
    f.addEventListener('submit', e => {
      e.preventDefault();
페이지 전환을 방지하면 사용자 인증 정보의 진위성을 확인하는 동안 사용자 인증 정보 정보를 유지할 수 있습니다.
요청을 전송하여 인증
사용자를 인증하려면 AJAX를 사용하여 인증 정보 전달합니다.
서버 측에서 HTTP 코드 200 또는 401로 응답하는 엔드포인트를 만들거나 기존 엔드포인트를 수정하여 브라우저에 가입/로그인/비밀번호 변경이 성공했는지 여부를 명확하게 알립니다.
예를 들면 다음과 같습니다.
// Try sign-in with AJAX
fetch('/signin', {
  method: 'POST',
  body: new FormData(e.target),
  credentials: 'include',
});
사용자 인증 정보 저장
사용자 인증 정보를 저장하려면 먼저 API를 사용할 수 있는지 확인한 다음 양식 요소를 인수로 사용하여 PasswordCredential를 동기식 또는 비동기식으로 인스턴스화합니다.
navigator.credentials.store()을 호출합니다.
API를 사용할 수 없는 경우 프로필 정보를 다음 단계로 전달하면 됩니다.
동기식 예:
if (window.PasswordCredential) {
  var c = new PasswordCredential(e.target);
  return navigator.credentials.store(c);
} else {
  return Promise.resolve(profile);
}
비동기 예:
if (window.PasswordCredential) {
  var c = await navigator.credentials.create({password: e.target});
  return navigator.credentials.store(c);
} else {
  return Promise.resolve(profile);
}
요청이 성공하면 사용자 인증 정보 저장 요청에 실패한 경우 사용자 인증 정보는 저장하지 마세요. 그러면 재방문 사용자가 혼란스러워집니다.
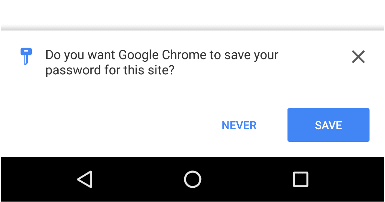
Chrome 브라우저에서 사용자 인증 정보(또는 제휴 프로바이더)를 저장하라는 알림이 표시됩니다.

UI 업데이트
문제가 없다면 프로필 정보를 사용하여 UI를 업데이트하거나 맞춤설정 페이지로 이동합니다.
     }).then(profile => {
       if (profile) {
         updateUI(profile);
       }
     }).catch(error => {
       showError('Sign-in Failed');
     });
    });
전체 코드 예시
// Get form's DOM object
var f = document.querySelector('#signup');
f.addEventListener('submit', (e) => {
  // Stop submitting form by itself
  e.preventDefault();

  // Try sign-in with AJAX
  fetch('/signin', {
    method: 'POST',
    body: new FormData(e.target),
    credentials: 'include',
  })
    .then((res) => {
      if (res.status == 200) {
        return Promise.resolve();
      } else {
        return Promise.reject('Sign-in failed');
      }
    })
    .then((profile) => {
      // Instantiate PasswordCredential with the form
      if (window.PasswordCredential) {
        var c = new PasswordCredential(e.target);
        return navigator.credentials.store(c);
      } else {
        return Promise.resolve(profile);
      }
    })
    .then((profile) => {
      // Successful sign-in
      if (profile) {
        updateUI(profile);
      }
    })
    .catch((error) => {
      // Sign-in failed
      showError('Sign-in Failed');
    });
});
브라우저 호환성
PasswordCredential
navigator.credentials.store()


