关于如何构建无障碍拆分按钮组件的基础性概览。
在这篇博文中,我想分享有关如何构建分离式按钮的想法。 试用演示版。
如果您更喜欢视频,可以观看此帖子的 YouTube 版本:
概览
拆分按钮是一种隐藏了主按钮和其他按钮列表的按钮。它们非常适合用于公开常用操作,同时嵌套次要的、不太常用的操作,直到需要时才显示。对于让繁忙的设计看起来简约,拆分按钮至关重要。高级分离按钮甚至可以记住用户的上一次操作,并将其提升到主要位置。
您可以在电子邮件应用中找到常见的拆分按钮。主要操作是发送,但您或许可以稍后发送或改为保存草稿:
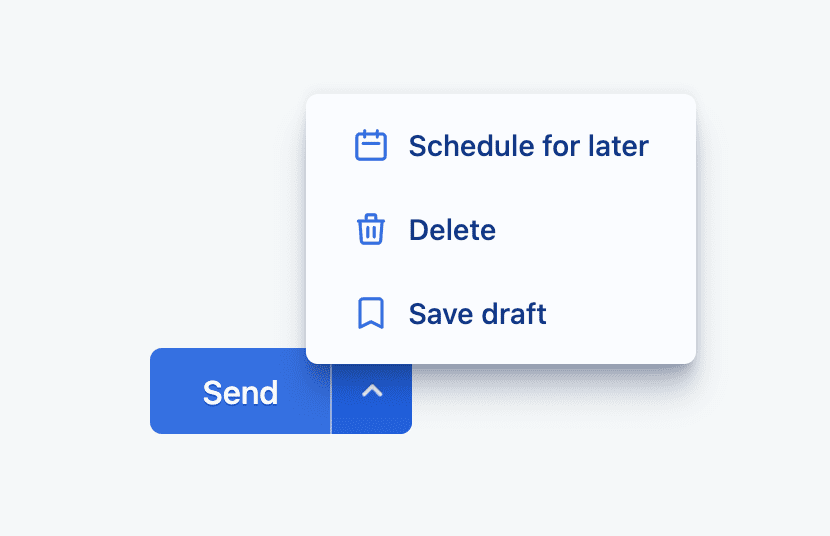
共享操作区域非常实用,因为用户无需四处寻找。他们知道,分屏按钮中包含重要的电子邮件操作。
零件
在讨论分离按钮的整体编排和最终用户体验之前,我们先来了解一下它的基本组成部分。 VisBug 的无障碍功能检查工具用于帮助显示组件的宏观视图,突出显示每个主要部分的 HTML、样式和无障碍功能方面。
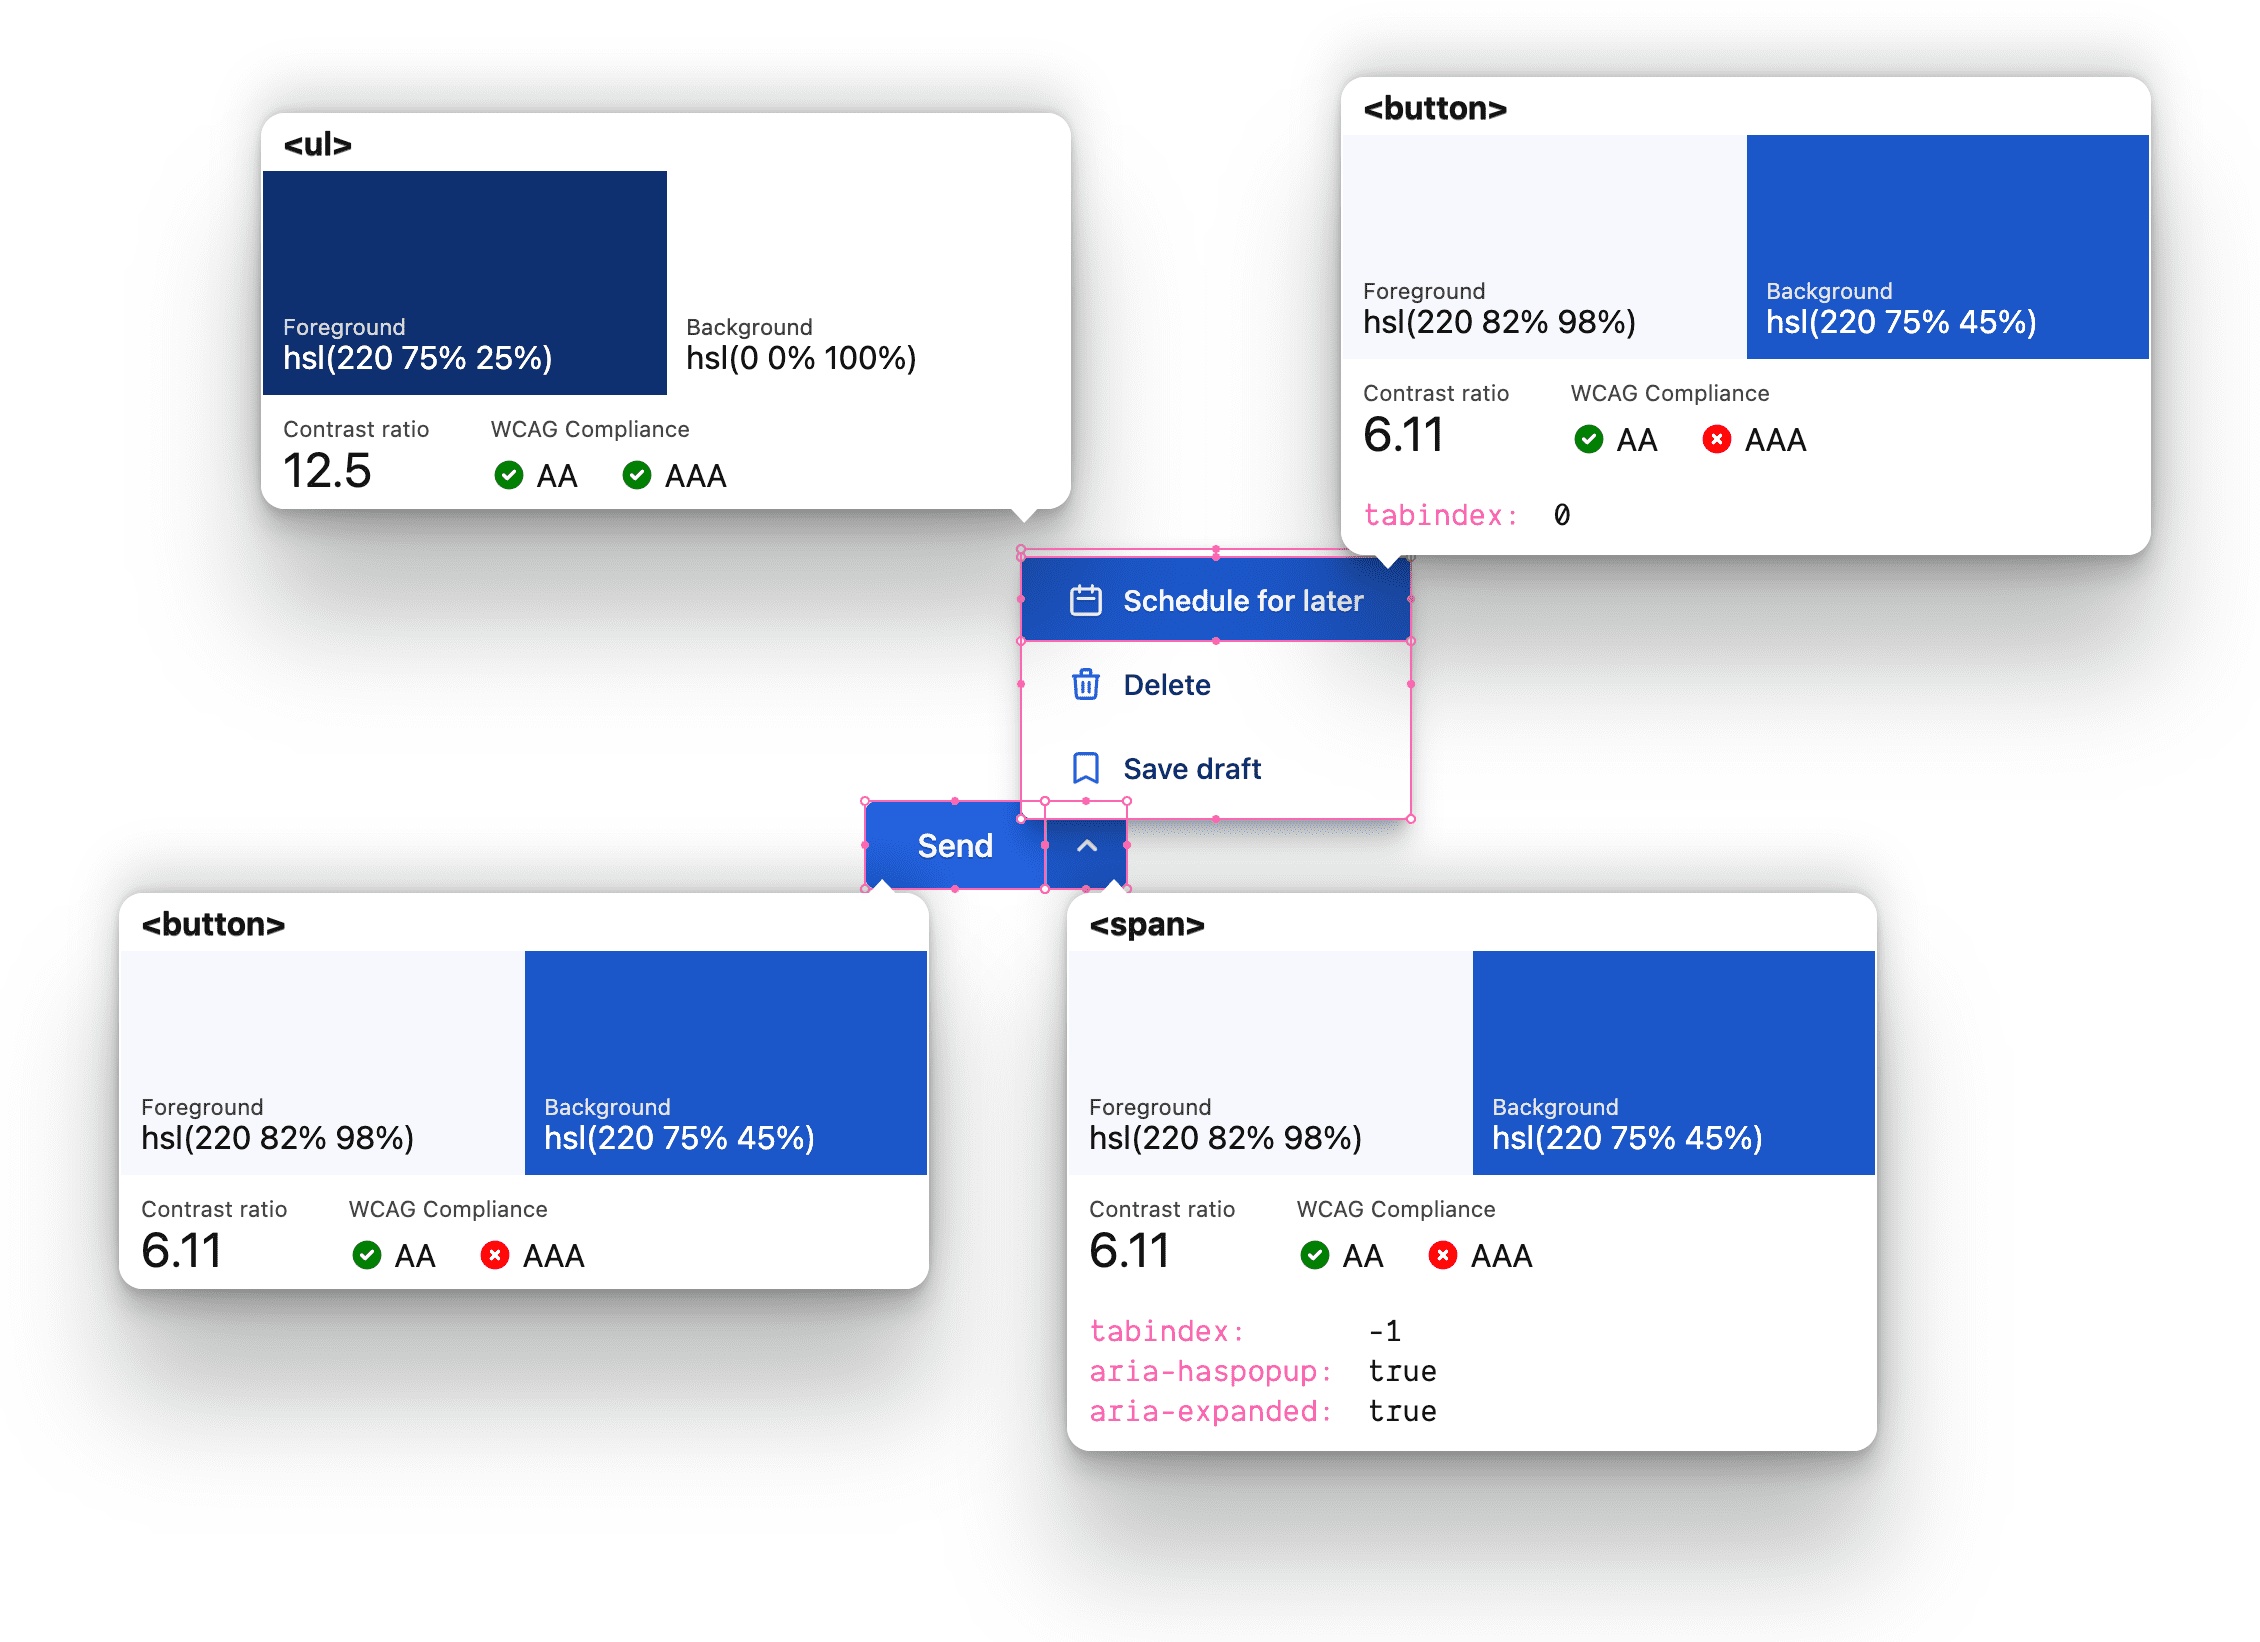
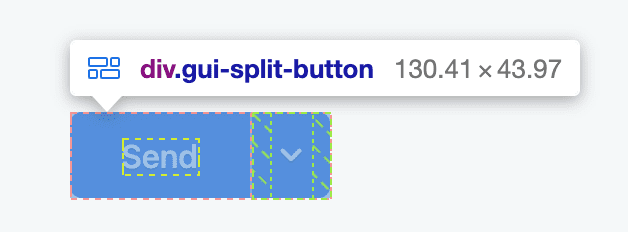
顶层拆分按钮容器
最高级别组件是内嵌 flexbox,其类为 gui-split-button,包含主要操作和 .gui-popup-button。
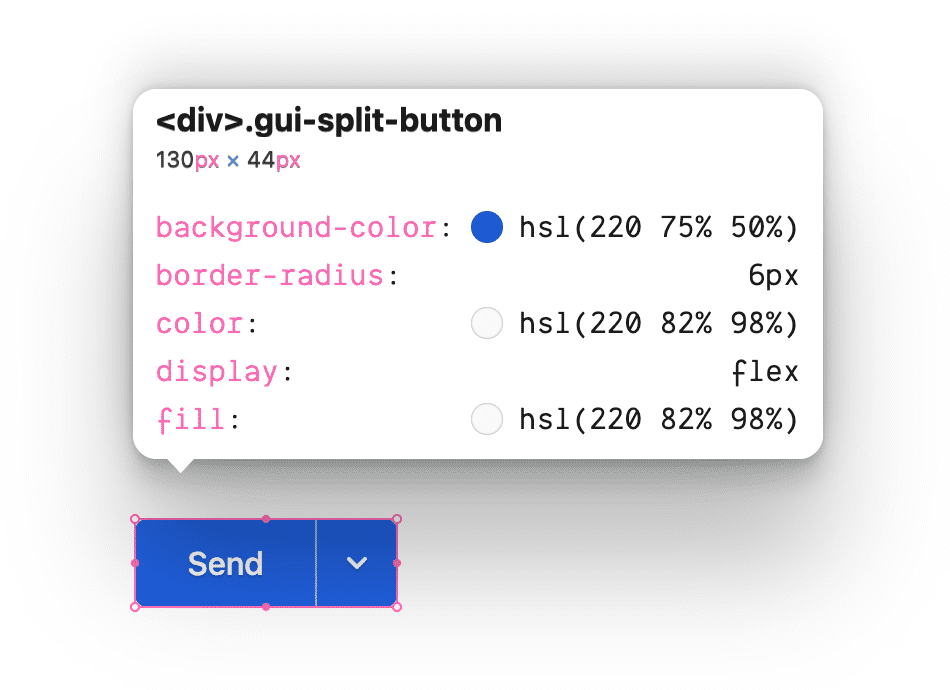
主要操作按钮
初始可见且可聚焦的 <button> 适合具有两个匹配的边角形状的容器,以便在 focus、hover 和 active 互动中显示在 .gui-split-button 内。
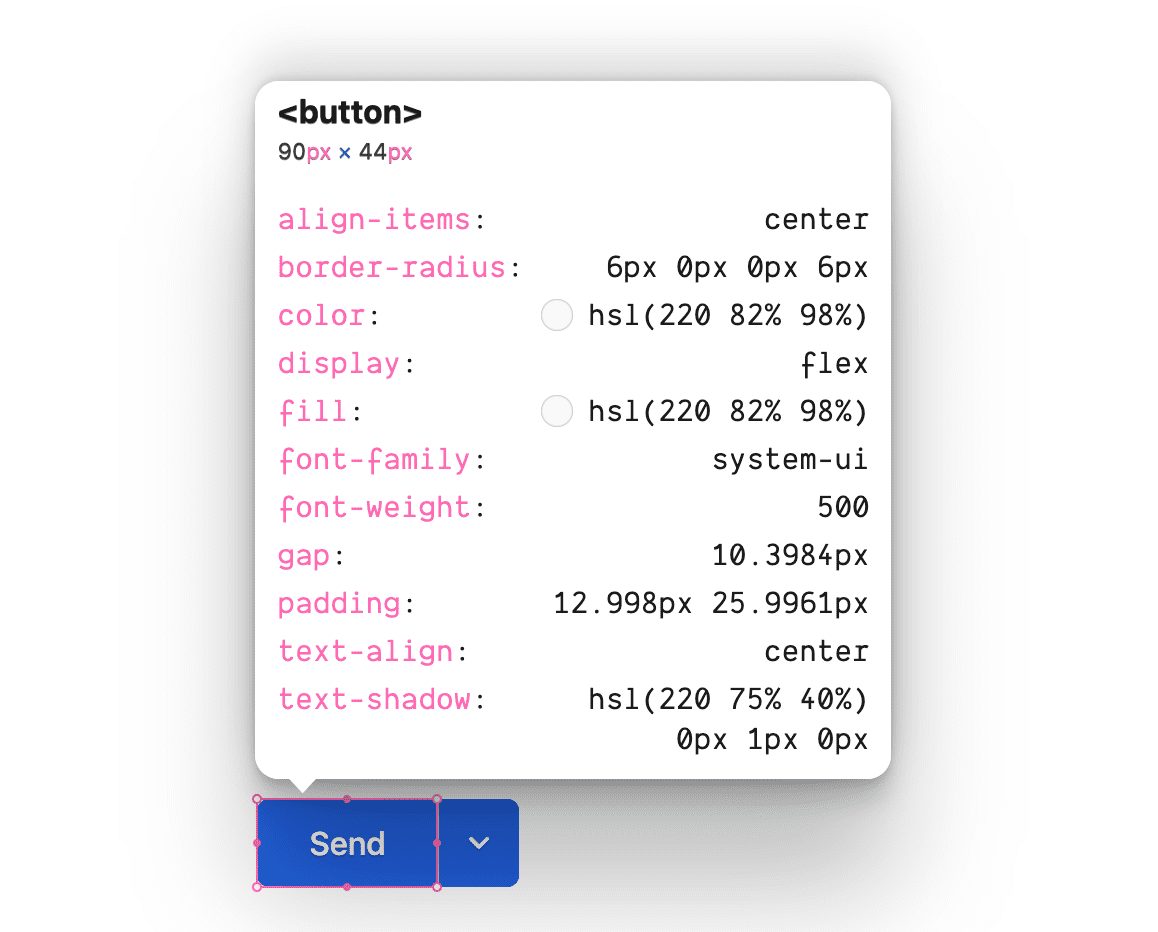
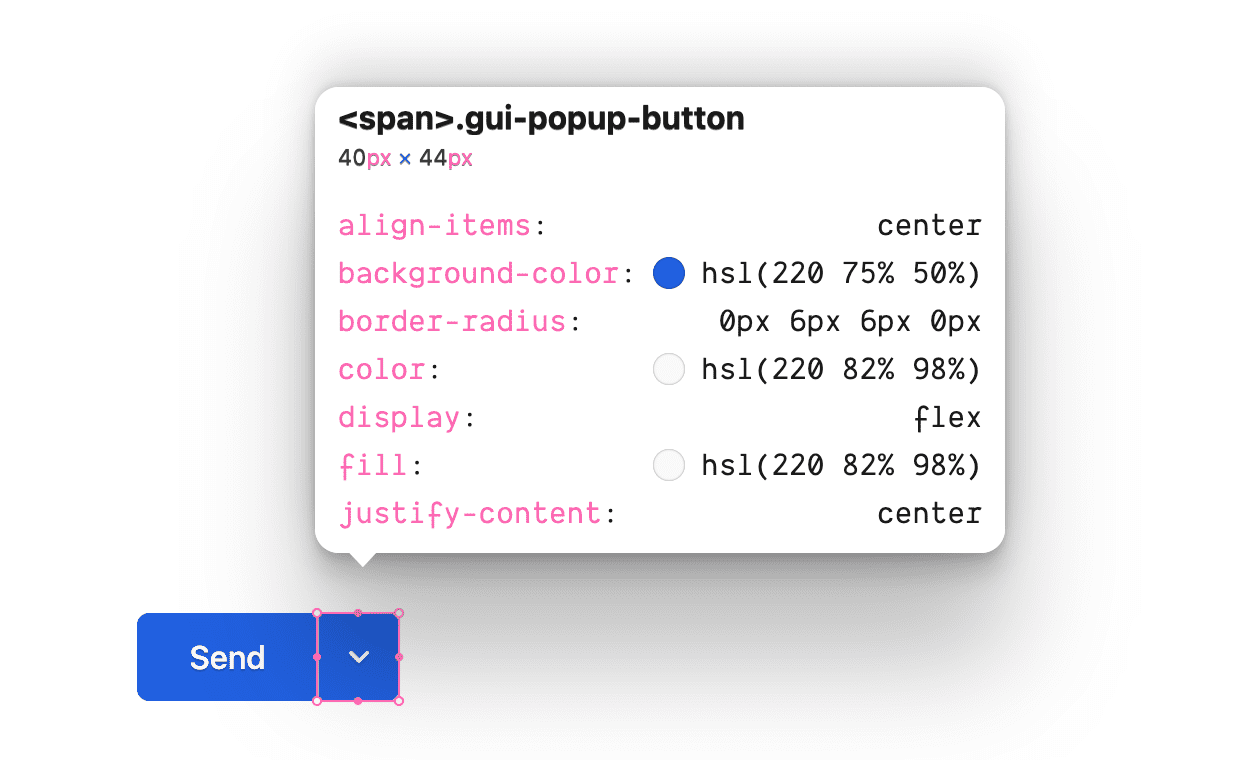
弹出式切换按钮
“弹出式按钮”支持元素用于激活和暗示辅助按钮列表。请注意,它不是 <button>,并且不可聚焦。不过,它是 .gui-popup 的定位锚点,也是用于显示弹出式窗口的 :focus-within 的宿主。
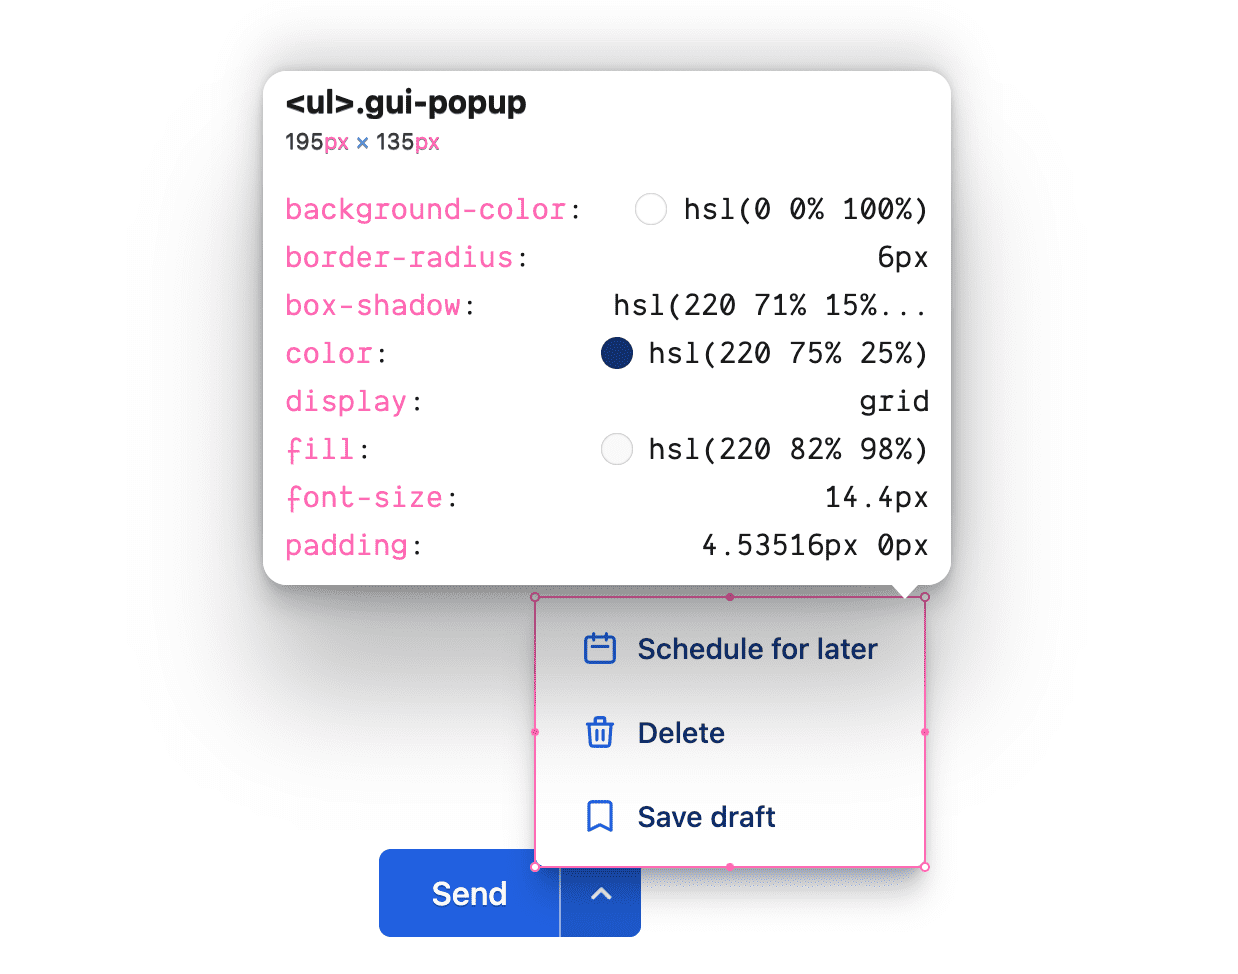
弹出式卡片
这是其锚点 .gui-popup-button 的浮动卡片子级,采用绝对定位,并以语义方式封装按钮列表。
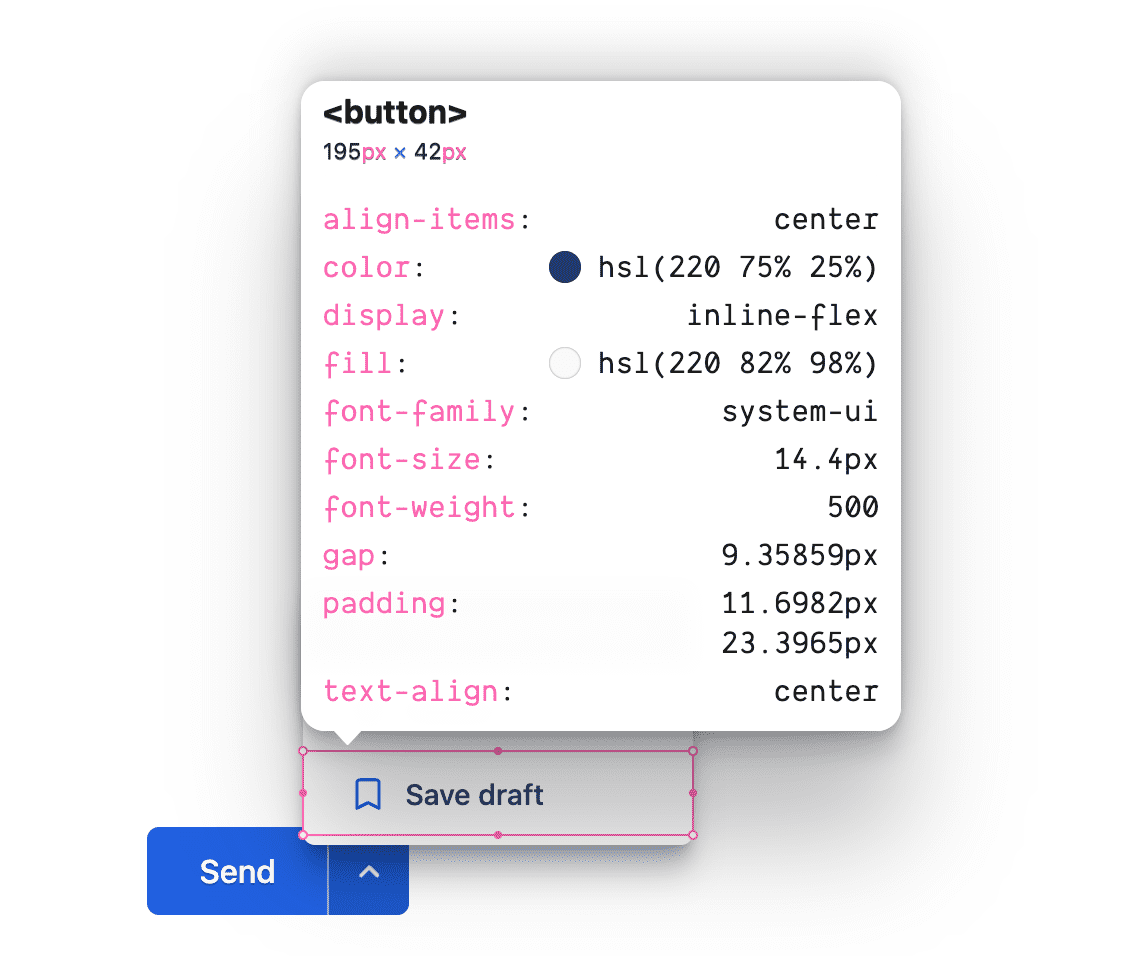
次要操作
可聚焦的 <button> 具有比主要操作按钮略小的字体大小,并具有与主要按钮互补的图标和样式。
自定义属性
以下变量有助于创建色彩和谐,并提供一个集中位置来修改整个组件中使用的值。
@custom-media --motionOK (prefers-reduced-motion: no-preference);
@custom-media --dark (prefers-color-scheme: dark);
@custom-media --light (prefers-color-scheme: light);

.gui-split-button {
  --theme:             hsl(220 75% 50%);
  --theme-hover:  hsl(220 75% 45%);
  --theme-active:  hsl(220 75% 40%);
  --theme-text:      hsl(220 75% 25%);
  --theme-border: hsl(220 50% 75%);
  --ontheme:         hsl(220 90% 98%);
  --popupbg:         hsl(220 0% 100%);

  --border: 1px solid var(--theme-border);
  --radius: 6px;
  --in-speed: 50ms;
  --out-speed: 300ms;

  @media (--dark) {
    --theme:             hsl(220 50% 60%);
    --theme-hover:  hsl(220 50% 65%);
    --theme-active:  hsl(220 75% 70%);
    --theme-text:      hsl(220 10% 85%);
    --theme-border: hsl(220 20% 70%);
    --ontheme:         hsl(220 90% 5%);
    --popupbg:         hsl(220 10% 30%);
  }
}
布局和颜色
Markup
该元素最初是一个具有自定义类名称的 <div>。
<div class="gui-split-button"></div>
添加主要按钮和 .gui-popup-button 元素。
<div class="gui-split-button">
  <button>Send</button>
  <span class="gui-popup-button" aria-haspopup="true" aria-expanded="false" title="Open for more actions"></span>
</div>
请注意 ARIA 属性 aria-haspopup 和 aria-expanded。这些提示对于屏幕阅读器了解拆分按钮体验的功能和状态至关重要。title 属性可让所有用户受益。
添加 <svg> 图标和 .gui-popup 容器元素。
<div class="gui-split-button">
  <button>Send</button>
  <span class="gui-popup-button" aria-haspopup="true" aria-expanded="false" title="Open for more actions">
    <svg aria-hidden="true" viewBox="0 0 20 20">
      <path d="M5.293 7.293a1 1 0 011.414 0L10 10.586l3.293-3.293a1 1 0 111.414 1.414l-4 4a1 1 0 01-1.414 0l-4-4a1 1 0 010-1.414z" />
    </svg>
    <ul class="gui-popup"></ul>
  </span>
</div>
对于简单的弹出式窗口放置,.gui-popup 是展开它的按钮的子级。此策略的唯一缺点是 .gui-split-button 容器不能使用 overflow: hidden,因为这会剪裁弹出窗口,使其无法直观地显示。
包含 <li><button> 内容的 <ul> 会向屏幕阅读器声明自己是“按钮列表”,这正是所呈现的界面。
<div class="gui-split-button">
  <button>Send</button>
  <span class="gui-popup-button" aria-haspopup="true" aria-expanded="false" title="Open for more actions">
    <svg aria-hidden="true" viewBox="0 0 20 20">
      <path d="M5.293 7.293a1 1 0 011.414 0L10 10.586l3.293-3.293a1 1 0 111.414 1.414l-4 4a1 1 0 01-1.414 0l-4-4a1 1 0 010-1.414z" />
    </svg>
    <ul class="gui-popup">
      <li>
        <button>Schedule for later</button>
      </li>
      <li>
        <button>Delete</button>
      </li>
      <li>
        <button>Save draft</button>
      </li>
    </ul>
  </span>
</div>
为了增添趣味并让颜色更具活力,我从 https://heroicons.com 中为次要按钮添加了图标。主要按钮和次要按钮都可以选择添加图标。
<div class="gui-split-button">
  <button>Send</button>
  <span class="gui-popup-button" aria-haspopup="true" aria-expanded="false" title="Open for more actions">
    <svg aria-hidden="true" viewBox="0 0 20 20">
      <path d="M5.293 7.293a1 1 0 011.414 0L10 10.586l3.293-3.293a1 1 0 111.414 1.414l-4 4a1 1 0 01-1.414 0l-4-4a1 1 0 010-1.414z" />
    </svg>
    <ul class="gui-popup">
      <li><button>
        <svg aria-hidden="true" viewBox="0 0 24 24">
          <path d="M8 7V3m8 4V3m-9 8h10M5 21h14a2 2 0 002-2V7a2 2 0 00-2-2H5a2 2 0 00-2 2v12a2 2 0 002 2z" />
        </svg>
        Schedule for later
      </button></li>
      <li><button>
        <svg aria-hidden="true" viewBox="0 0 24 24">
          <path d="M19 7l-.867 12.142A2 2 0 0116.138 21H7.862a2 2 0 01-1.995-1.858L5 7m5 4v6m4-6v6m1-10V4a1 1 0 00-1-1h-4a1 1 0 00-1 1v3M4 7h16" />
        </svg>
        Delete
      </button></li>
      <li><button>
        <svg aria-hidden="true" viewBox="0 0 24 24">
          <path d="M5 5a2 2 0 012-2h10a2 2 0 012 2v16l-7-3.5L5 21V5z" />
        </svg>
        Save draft
      </button></li>
    </ul>
  </span>
</div>
样式
有了 HTML 和内容后,样式就可以提供颜色和布局了。
设置拆分按钮容器的样式
inline-flex 显示类型非常适合此封装容器组件,因为它应与其他拆分按钮、操作或元素内嵌显示。
.gui-split-button {
  display: inline-flex;
  border-radius: var(--radius);
  background: var(--theme);
  color: var(--ontheme);
  fill: var(--ontheme);

  touch-action: manipulation;
  user-select: none;
  -webkit-tap-highlight-color: transparent;
}
<button> 样式
按钮非常擅长隐藏所需的代码量。您可能需要撤消或替换浏览器默认样式,但还需要强制执行一些继承,添加互动状态,并适应各种用户偏好设置和输入类型。按钮样式会很快增加。
这些按钮与常规按钮不同,因为它们与父元素共用一个背景。通常,按钮拥有自己的背景和文本颜色。 不过,这些动画会共享背景,并且仅在互动时应用自己的背景。
.gui-split-button button {
  cursor: pointer;
  appearance: none;
  background: none;
  border: none;

  display: inline-flex;
  align-items: center;
  gap: 1ch;
  white-space: nowrap;

  font-family: inherit;
  font-size: inherit;
  font-weight: 500;

  padding-block: 1.25ch;
  padding-inline: 2.5ch;

  color: var(--ontheme);
  outline-color: var(--theme);
  outline-offset: -5px;
}
通过一些 CSS 伪类添加互动状态,并使用与状态匹配的自定义属性:
.gui-split-button button {
  …

  &:is(:hover, :focus-visible) {
    background: var(--theme-hover);
    color: var(--ontheme);

    & > svg {
      stroke: currentColor;
      fill: none;
    }
  }

  &:active {
    background: var(--theme-active);
  }
}
主按钮需要一些特殊样式才能实现完整的设计效果:
.gui-split-button > button {
  border-end-start-radius: var(--radius);
  border-start-start-radius: var(--radius);

  & > svg {
    fill: none;
    stroke: var(--ontheme);
  }
}
最后,为了增加一些美感,浅色主题按钮和图标添加了阴影:
.gui-split-button {
  @media (--light) {
    & > button,
    & button:is(:focus-visible, :hover) {
      text-shadow: 0 1px 0 var(--theme-active);
    }
    & > .gui-popup-button > svg,
    & button:is(:focus-visible, :hover) > svg {
      filter: drop-shadow(0 1px 0 var(--theme-active));
    }
  }
}
出色的按钮会注重微互动和细微的细节。
关于 :focus-visible 的注意事项
请注意,按钮样式使用的是 :focus-visible 而不是 :focus。:focus是打造无障碍用户界面的关键,但它有一个缺点:它无法智能判断用户是否需要看到它,而是会应用于任何焦点。
以下视频试图分解这种微互动,以展示 :focus-visible 如何成为智能替代方案。
设置弹出式按钮的样式
用于将图标居中并锚定弹出式按钮列表的 4ch flexbox。与主按钮类似,在悬停或互动之前,它都是透明的,并且会拉伸以填充。

.gui-popup-button {
  inline-size: 4ch;
  cursor: pointer;
  position: relative;
  display: inline-flex;
  align-items: center;
  justify-content: center;
  border-inline-start: var(--border);
  border-start-end-radius: var(--radius);
  border-end-end-radius: var(--radius);
}
使用 CSS 嵌套和 :is() 功能选择器添加悬停、焦点和活动状态:
.gui-popup-button {
  …

  &:is(:hover,:focus-within) {
    background: var(--theme-hover);
  }

  /* fixes iOS trying to be helpful */
  &:focus {
    outline: none;
  }

  &:active {
    background: var(--theme-active);
  }
}
这些样式是用于显示和隐藏弹出式窗口的主要钩子。当 .gui-popup-button 的任何子级具有 focus 时,请在图标和弹出式窗口上设置 opacity、位置和 pointer-events。
.gui-popup-button {
  …

  &:focus-within {
    & > svg {
      transition-duration: var(--in-speed);
      transform: rotateZ(.5turn);
    }
    & > .gui-popup {
      transition-duration: var(--in-speed);
      opacity: 1;
      transform: translateY(0);
      pointer-events: auto;
    }
  }
}
完成进入和退出样式后,最后一步是根据用户的运动偏好有条件地转换转换:
.gui-popup-button {
  …

  @media (--motionOK) {
    & > svg {
      transition: transform var(--out-speed) ease;
    }
    & > .gui-popup {
      transform: translateY(5px);

      transition:
        opacity var(--out-speed) ease,
        transform var(--out-speed) ease;
    }
  }
}
如果仔细查看代码,就会发现对于偏好减少动作的用户,不透明度仍会过渡。
设置弹出式窗口的样式
.gui-popup 元素是一个浮动卡片按钮列表,使用自定义属性和相对单位,使其比主按钮略小,可与主按钮进行交互式匹配,并且通过使用颜色来体现品牌风格。请注意,这些图标的对比度较低,线条更细,阴影中带有少许品牌蓝色。与按钮一样,出色的界面和用户体验也是由这些小细节堆叠而成的。
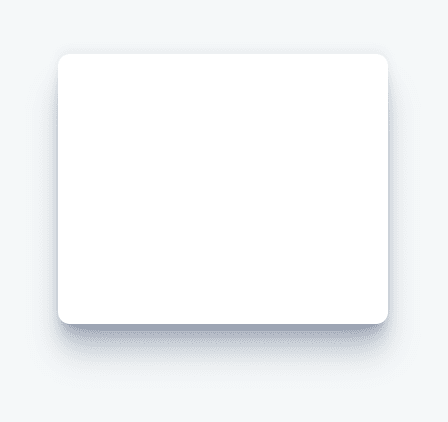
.gui-popup {
  --shadow: 220 70% 15%;
  --shadow-strength: 1%;

  opacity: 0;
  pointer-events: none;

  position: absolute;
  bottom: 80%;
  left: -1.5ch;

  list-style-type: none;
  background: var(--popupbg);
  color: var(--theme-text);
  padding-inline: 0;
  padding-block: .5ch;
  border-radius: var(--radius);
  overflow: hidden;
  display: flex;
  flex-direction: column;
  font-size: .9em;
  transition: opacity var(--out-speed) ease;

  box-shadow:
    0 -2px 5px 0 hsl(var(--shadow) / calc(var(--shadow-strength) + 5%)),
    0 1px 1px -2px hsl(var(--shadow) / calc(var(--shadow-strength) + 10%)),
    0 2px 2px -2px hsl(var(--shadow) / calc(var(--shadow-strength) + 12%)),
    0 5px 5px -2px hsl(var(--shadow) / calc(var(--shadow-strength) + 13%)),
    0 9px 9px -2px hsl(var(--shadow) / calc(var(--shadow-strength) + 14%)),
    0 16px 16px -2px hsl(var(--shadow) / calc(var(--shadow-strength) + 20%))
  ;
}
为图标和按钮添加品牌颜色,以便在每个深色和浅色主题卡片中实现美观的样式:
![]()
.gui-popup {
  …

  & svg {
    fill: var(--popupbg);
    stroke: var(--theme);

    @media (prefers-color-scheme: dark) {
      stroke: var(--theme-border);
    }
  }

  & button {
    color: var(--theme-text);
    width: 100%;
  }
}
深色主题弹出式窗口添加了文字和图标阴影,以及略微更强的框阴影:
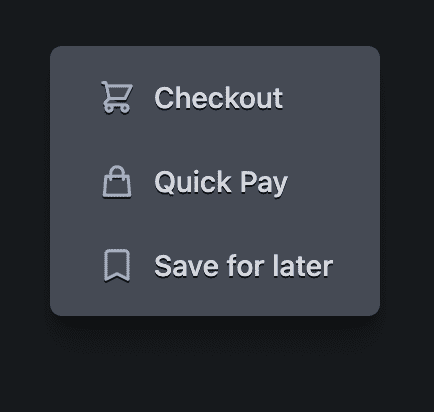
.gui-popup {
  …

  @media (--dark) {
    --shadow-strength: 5%;
    --shadow: 220 3% 2%;

    & button:not(:focus-visible, :hover) {
      text-shadow: 0 1px 0 var(--ontheme);
    }

    & button:not(:focus-visible, :hover) > svg {
      filter: drop-shadow(0 1px 0 var(--ontheme));
    }
  }
}
通用 <svg> 图标样式
所有图标都根据其所用按钮 font-size 的大小进行相对调整,方法是将 ch 单位用作 inline-size。每个图标还应用了一些样式,以帮助柔化和顺滑图标轮廓。
.gui-split-button svg {
  inline-size: 2ch;
  box-sizing: content-box;
  stroke-linecap: round;
  stroke-linejoin: round;
  stroke-width: 2px;
}
从右到左的布局
逻辑属性负责完成所有复杂工作。
以下是所使用的逻辑属性列表:
- display: inline-flex 创建一个内嵌 flex 元素。
- padding-block 和 padding-inline 成对使用,而不是使用 padding 简写,可获得填充逻辑两侧的好处。
- border-end-start-radius 和 好友将根据文档方向对边角进行圆角处理。
- inline-size 而不是 width 可确保尺寸不受物理尺寸的限制。
- border-inline-start 会在开头添加边框,具体是在右侧还是左侧取决于脚本方向。
JavaScript
以下 JavaScript 几乎全部用于增强无障碍功能。我使用了两个辅助库来简化任务。 BlingBlingJS 用于简洁的 DOM 查询和简单的事件监听器设置,而 roving-ux 有助于实现弹出式窗口的可访问键盘和手柄互动。
import $ from 'blingblingjs'
import {rovingIndex} from 'roving-ux'

const splitButtons = $('.gui-split-button')
const popupButtons = $('.gui-popup-button')
导入上述库并将所选元素保存到变量中后,只需再添加几个函数即可升级体验。
漫游指数
当键盘或屏幕阅读器聚焦于 .gui-popup-button 时,我们希望将焦点转发到 .gui-popup 中的第一个(或最近聚焦的)按钮。该库可帮助我们通过 element 和 target 参数实现此目的。
popupButtons.forEach(element =>
  rovingIndex({
    element,
    target: 'button',
  }))
该元素现在会将焦点传递给目标 <button> 子元素,并启用标准箭头键导航来浏览选项。
切换 aria-expanded
虽然从视觉上来看,弹出式窗口的显示和隐藏很明显,但屏幕阅读器需要的不仅仅是视觉提示。这里使用 JavaScript 来补充 CSS 驱动的 :focus-within 互动,方法是切换适合屏幕阅读器的属性。
popupButtons.on('focusin', e => {
  e.currentTarget.setAttribute('aria-expanded', true)
})

popupButtons.on('focusout', e => {
  e.currentTarget.setAttribute('aria-expanded', false)
})
启用 Escape 键
用户的焦点被有意发送到陷阱,这意味着我们需要提供一种离开方式。最常见的方法是允许使用 Escape 键。为此,请注意弹出式按钮上的按键,因为子级上的任何键盘事件都会冒泡到此父级。
popupButtons.on('keyup', e => {
  if (e.code === 'Escape')
    e.target.blur()
})
如果弹出式按钮检测到任何 Escape 按键,它会使用 blur() 从自身移除焦点。
拆分按钮点击次数
最后,如果用户点击、点按按钮或通过键盘与按钮互动,应用需要执行相应操作。这里再次使用了事件冒泡,但这次是在 .gui-split-button 容器上,以捕获来自子弹出式窗口或主要操作的按钮点击。
splitButtons.on('click', event => {
  if (event.target.nodeName !== 'BUTTON') return
  console.info(event.target.innerText)
})
总结
现在您已经知道我是如何做到的,那么您会怎么做呢?🙂
让我们丰富方法,了解在网络上构建内容的所有方式。 制作演示视频,通过 Twitter 向我发送链接,我会将其添加到下方的社区混音部分!


