
파일 시스템 표준에서는 페이지 출처에 비공개이고 사용자에게는 표시되지 않는 스토리지 엔드포인트로 출처 비공개 파일 시스템 (OPFS)을 도입합니다. OPFS는 성능에 최적화된 특수한 종류의 파일에 대한 선택적 액세스를 제공합니다.

브라우저 지원
출처 비공개 파일 시스템은 최신 브라우저에서 지원되며 웹 하이퍼텍스트 애플리케이션 기술 작업 그룹 (WHATWG)에서 파일 시스템 라이브 표준으로 표준화되었습니다.
' d='M96 183a64 64 0 0 1-23-23L17 64a128 128 0 0 0 111 192l55-96a64 64 0 0 1-87 23Z'/%3E%3Cpath fill='url(%23b)' d='M192 128a64 64 0 0 1-9 32l-55 96A128 128 0 0 0 239 64H128a64 64 0 0 1 64 64Z'/%3E%3Ccircle cx='128' cy='128' r='52' fill='%231a73e8'/%3E%3Cpath fill='url(%23c)' d='M96 73a64 64 0 0 1 32-9h111a128 128 0 0 0-222 0l56 96a64 64 0 0 1 23-87Z'/%3E%3C/svg%3E)
' xlink:href='%23A'%3E%3Cstop offset='.76' stop-opacity='0'/%3E%3Cstop offset='.95' stop-opacity='.5'/%3E%3Cstop offset='1'/%3E%3C/radialGradient%3E%3CradialGradient id='F' cx='2523' cy='4680' r='20243' gradientTransform='matrix(-.03715 .99931 -2.12836 -.07913 13579 3530)' xlink:href='%23A'%3E%3Cstop offset='0' stop-color='%2335c1f1'/%3E%3Cstop offset='.11' stop-color='%2334c1ed'/%3E%3Cstop offset='.23' stop-color='%232fc2df'/%3E%3Cstop offset='.31' stop-color='%232bc3d2'/%3E%3Cstop offset='.67' stop-color='%2336c752'/%3E%3C/radialGradient%3E%3CradialGradient id='G' cx='24247' cy='7758' r='9734' gradientTransform='matrix(.28109 .95968 -.78353 .22949 24510 -16292)' xlink:href='%23A'%3E%3Cstop offset='0' stop-color='%2366eb6e'/%3E%3Cstop offset='1' stop-color='%2366eb6e' stop-opacity='0'/%3E%3C/radialGradient%3E%3Cpath id='H' d='M24105 20053a9345 9345 0 01-1053 472 10202 10202 0 01-3590 646c-4732 0-8855-3255-8855-7432 0-1175 680-2193 1643-2729-4280 180-5380 4640-5380 7253 0 7387 6810 8137 8276 8137 791 0 1984-230 2704-456l130-44a12834 12834 0 006660-5282c220-350-168-757-535-565z'/%3E%3Cpath id='I' d='M11571 25141a7913 7913 0 01-2273-2137 8145 8145 0 01-1514-4740 8093 8093 0 013093-6395 8082 8082 0 011373-859c312-148 846-414 1554-404a3236 3236 0 012569 1297 3184 3184 0 01636 1866c0-21 2446-7960-8005-7960-4390 0-8004 4166-8004 7820 0 2319 538 4170 1212 5604a12833 12833 0 007684 6757 12795 12795 0 003908 610c1414 0 2774-233 4045-656a7575 7575 0 01-6278-803z'/%3E%3Cpath id='J' d='M16231 15886c-80 105-330 250-330 566 0 260 170 512 472 723 1438 1003 4149 868 4156 868a5954 5954 0 003027-839 6147 6147 0 001133-850 6180 6180 0 001910-4437c26-2242-796-3732-1133-4392-2120-4141-6694-6525-11668-6525-7011 0-12703 5635-12798 12620 47-3654 3679-6605 7996-6605 350 0 2346 34 4200 1007 1634 858 2490 1894 3086 2921 618 1067 728 2415 728 2952s-271 1333-780 1990z'/%3E%3Cuse fill='url(%23B)' xlink:href='%23H'/%3E%3Cuse fill='url(%23D)' opacity='.35' xlink:href='%23H'/%3E%3Cuse fill='url(%23C)' xlink:href='%23I'/%3E%3Cuse fill='url(%23E)' opacity='.4' xlink:href='%23I'/%3E%3Cuse fill='url(%23F)' xlink:href='%23J'/%3E%3Cuse fill='url(%23G)' xlink:href='%23J'/%3E%3C/svg%3E)
' gradientUnits='userSpaceOnUse'%3E%3Cstop offset='.2' stop-color='%239059ff' stop-opacity='0'/%3E%3Cstop offset='.3' stop-color='%238c4ff3' stop-opacity='.1'/%3E%3Cstop offset='.8' stop-color='%237716a8' stop-opacity='.5'/%3E%3Cstop offset='1' stop-color='%236e008b' stop-opacity='.6'/%3E%3C/radialGradient%3E%3CradialGradient id='ff-g' cx='239.1' cy='34.6' r='171.6' gradientUnits='userSpaceOnUse'%3E%3Cstop offset='0' stop-color='%23ffe226'/%3E%3Cstop offset='.1' stop-color='%23ffdb27'/%3E%3Cstop offset='.3' stop-color='%23ffc82a'/%3E%3Cstop offset='.5' stop-color='%23ffa930'/%3E%3Cstop offset='.7' stop-color='%23ff7e37'/%3E%3Cstop offset='.8' stop-color='%23ff7139'/%3E%3C/radialGradient%3E%3CradialGradient id='ff-h' cx='374' cy='-74.3' r='732.2' gradientUnits='userSpaceOnUse'%3E%3Cstop offset='.1' stop-color='%23fff44f'/%3E%3Cstop offset='.5' stop-color='%23ff980e'/%3E%3Cstop offset='.6' stop-color='%23ff5634'/%3E%3Cstop offset='.7' stop-color='%23ff3647'/%3E%3Cstop offset='.9' stop-color='%23e31587'/%3E%3C/radialGradient%3E%3CradialGradient id='ff-i' cx='304.6' cy='7.1' r='536.4' gradientTransform='rotate(84 303 4)' gradientUnits='userSpaceOnUse'%3E%3Cstop offset='0' stop-color='%23fff44f'/%3E%3Cstop offset='.1' stop-color='%23ffe847'/%3E%3Cstop offset='.2' stop-color='%23ffc830'/%3E%3Cstop offset='.3' stop-color='%23ff980e'/%3E%3Cstop offset='.4' stop-color='%23ff8b16'/%3E%3Cstop offset='.5' stop-color='%23ff672a'/%3E%3Cstop offset='.6' stop-color='%23ff3647'/%3E%3Cstop offset='.7' stop-color='%23e31587'/%3E%3C/radialGradient%3E%3CradialGradient id='ff-j' cx='235' cy='98.1' r='457.1' gradientUnits='userSpaceOnUse'%3E%3Cstop offset='.1' stop-color='%23fff44f'/%3E%3Cstop offset='.5' stop-color='%23ff980e'/%3E%3Cstop offset='.6' stop-color='%23ff5634'/%3E%3Cstop offset='.7' stop-color='%23ff3647'/%3E%3Cstop offset='.9' stop-color='%23e31587'/%3E%3C/radialGradient%3E%3CradialGradient id='ff-k' cx='355.7' cy='124.9' r='500.3' gradientUnits='userSpaceOnUse'%3E%3Cstop offset='.1' stop-color='%23fff44f'/%3E%3Cstop offset='.2' stop-color='%23ffe141'/%3E%3Cstop offset='.5' stop-color='%23ffaf1e'/%3E%3Cstop offset='.6' stop-color='%23ff980e'/%3E%3C/radialGradient%3E%3ClinearGradient id='ff-a' x1='446.9' y1='76.8' x2='47.9' y2='461.8' gradientUnits='userSpaceOnUse'%3E%3Cstop offset='.1' stop-color='%23fff44f'/%3E%3Cstop offset='.1' stop-color='%23ffe847'/%3E%3Cstop offset='.2' stop-color='%23ffc830'/%3E%3Cstop offset='.4' stop-color='%23ff980e'/%3E%3Cstop offset='.4' stop-color='%23ff8b16'/%3E%3Cstop offset='.5' stop-color='%23ff672a'/%3E%3Cstop offset='.5' stop-color='%23ff3647'/%3E%3Cstop offset='.7' stop-color='%23e31587'/%3E%3C/linearGradient%3E%3ClinearGradient id='ff-l' x1='442.1' y1='74.8' x2='102.6' y2='414.3' gradientUnits='userSpaceOnUse'%3E%3Cstop offset='.2' stop-color='%23fff44f' stop-opacity='.8'/%3E%3Cstop offset='.3' stop-color='%23fff44f' stop-opacity='.6'/%3E%3Cstop offset='.5' stop-color='%23fff44f' stop-opacity='.2'/%3E%3Cstop offset='.6' stop-color='%23fff44f' stop-opacity='0'/%3E%3C/linearGradient%3E%3C/defs%3E%3Cpath d='M479 166c-11-25-32-52-49-60a249 249 0 0 1 25 73c-27-68-73-95-111-155a255 255 0 0 1-8-14 44 44 0 0 1-4-9 1 1 0 0 0 0-1 1 1 0 0 0-1 0c-60 35-81 101-83 134a120 120 0 0 0-66 25 71 71 0 0 0-6-5 111 111 0 0 1-1-58c-25 11-44 29-58 44-9-12-9-52-8-60l-8 4a175 175 0 0 0-24 21 210 210 0 0 0-22 26 203 203 0 0 0-32 73l-1 2-2 15a229 229 0 0 0-4 34v1a240 240 0 0 0 477 40l1-9c5-41 0-84-15-121zM202 355l3 1-3-1zm55-145zm198-31z' fill='url(%23ff-a)'/%3E%3Cpath d='M479 166c-11-25-32-52-49-60 14 26 22 53 25 72v1a207 207 0 0 1-206 279c-113-3-212-87-231-197-3-17 0-26 2-40-2 11-3 14-4 34v1a240 240 0 0 0 477 40l1-9c5-41 0-84-15-121z' fill='url(%23ff-b)'/%3E%3Cpath d='M479 166c-11-25-32-52-49-60 14 26 22 53 25 72v1a207 207 0 0 1-206 279c-113-3-212-87-231-197-3-17 0-26 2-40-2 11-3 14-4 34v1a240 240 0 0 0 477 40l1-9c5-41 0-84-15-121z' fill='url(%23ff-c)'/%3E%3Cpath d='m362 195 1 1a130 130 0 0 0-22-29C266 92 322 5 331 0c-60 35-81 101-83 134l9-1c45 0 84 25 105 62z' fill='url(%23ff-d)'/%3E%3Cpath d='M257 210c-1 6-22 26-29 26-68 0-80 41-80 41 3 35 28 64 57 79l4 2 7 3a107 107 0 0 0 31 6c120 6 143-143 57-186 22-4 45 5 58 14-21-37-60-62-105-62l-9 1a120 120 0 0 0-66 25l17 16c16 16 58 33 58 35z' fill='url(%23ff-e)'/%3E%3Cpath d='M257 210c-1 6-22 26-29 26-68 0-80 41-80 41 3 35 28 64 57 79l4 2 7 3a107 107 0 0 0 31 6c120 6 143-143 57-186 22-4 45 5 58 14-21-37-60-62-105-62l-9 1a120 120 0 0 0-66 25l17 16c16 16 58 33 58 35z' fill='url(%23ff-f)'/%3E%3Cpath d='m171 151 5 3a111 111 0 0 1-1-58c-25 11-44 29-58 44 1 0 36 0 54 11z' fill='url(%23ff-g)'/%3E%3Cpath d='M18 261a242 242 0 0 0 231 197 207 207 0 0 0 206-279c8 56-20 110-64 146-86 71-169 43-186 31l-3-1c-50-24-71-70-67-110-42 0-57-35-57-35s38-28 89-4c46 22 90 4 90 4 0-2-42-19-58-35l-17-16a71 71 0 0 0-6-5l-5-3c-18-11-52-11-54-11-9-12-9-51-8-60l-8 4a175 175 0 0 0-24 21 210 210 0 0 0-22 26 203 203 0 0 0-32 73c0 1-9 38-5 57z' fill='url(%23ff-h)'/%3E%3Cpath d='M341 167a130 130 0 0 1 22 29 46 46 0 0 1 4 3c55 50 26 121 24 126 44-36 72-90 64-146-27-68-73-95-111-155a255 255 0 0 1-8-14 44 44 0 0 1-4-9 1 1 0 0 0 0-1 1 1 0 0 0-1 0c-9 5-65 92 10 167z' fill='url(%23ff-i)'/%3E%3Cpath d='M367 199a46 46 0 0 0-4-3l-1-1c-13-9-36-18-58-15 86 44 63 193-57 187a107 107 0 0 1-31-6 131 131 0 0 1-11-5c17 12 99 39 186-31 2-5 31-76-24-126z' fill='url(%23ff-j)'/%3E%3Cpath d='M148 277s12-41 80-41c7 0 28-20 29-26s-44 18-90-4c-51-24-89 4-89 4s15 35 57 35c-4 40 16 85 67 110l3 1c-29-15-54-44-57-79z' fill='url(%23ff-k)'/%3E%3Cpath d='M479 166c-11-25-32-52-49-60a249 249 0 0 1 25 73c-27-68-73-95-111-155a255 255 0 0 1-8-14 44 44 0 0 1-4-9 1 1 0 0 0 0-1 1 1 0 0 0-1 0c-60 35-81 101-83 134l9-1c45 0 84 25 105 62-13-9-36-18-58-14 86 43 63 192-57 186a107 107 0 0 1-31-6 131 131 0 0 1-11-5l-3-1 3 1c-29-15-54-44-57-79 0 0 12-41 80-41 7 0 28-20 29-26 0-2-42-19-58-35l-17-16a71 71 0 0 0-6-5 111 111 0 0 1-1-58c-25 11-44 29-58 44-9-12-9-52-8-60l-8 4a175 175 0 0 0-24 21 210 210 0 0 0-22 26 203 203 0 0 0-32 73l-1 2-2 15a279 279 0 0 0-4 34v1a240 240 0 0 0 477 40l1-9c5-41 0-84-15-121zm-24 13z' fill='url(%23ff-l)'/%3E%3C/svg%3E)
' xlink:href='%23s-b'%3E%3Cstop offset='0' stop-color='%2324a5f3' stop-opacity='0' /%3E%3Cstop offset='1' stop-color='%231e8ceb' /%3E%3C/radialGradient%3E%3CradialGradient id='s-j' cx='109.3' cy='13.8' r='93.1' gradientTransform='matrix(-.02 1.1 -1.04 -.02 137 -115)' xlink:href='%23s-b'%3E%3Cstop offset='0' stop-opacity='0' /%3E%3Cstop offset='1' stop-color='%235488d6' stop-opacity='0' /%3E%3Cstop offset='1' stop-color='%235d96eb' /%3E%3C/radialGradient%3E%3C/defs%3E%3Crect width='220' height='220' x='22' y='-107' fill='url(%23s-a)' ry='49' transform='matrix(.57 0 0 .57 187 256)' /%3E%3Cg transform='translate(194 190)'%3E%3Ccircle cx='67.8' cy='67.7' fill='url(%23s-c)' paint-order='stroke fill markers' r='54' /%3E%3Ccircle cx='-69.9' cy='69.3' fill='url(%23s-i)' transform='translate(138 -2)' r='54' /%3E%3C/g%3E%3Cellipse cx='120' cy='14.2' fill='url(%23s-j)' rx='93.1' ry='93.7' transform='matrix(.58 0 0 .58 192 250)' /%3E%3Cg transform='matrix(.58 0 0 .57 197 182)'%3E%3Cpath fill='%23cac7c8' d='M46 192h1l72-48-7-9-66 57Z' /%3E%3Cpath fill='%23fbfffc' d='M46 191v1l66-57-7-9-59 65Z' /%3E%3Cpath fill='url(%23s-d)' d='m119 144-7-9 66-57-59 66Z' /%3E%3Cpath fill='%23fb645c' d='m105 126 7 9 66-57-1-1-72 49Z' /%3E%3C/g%3E%3Cpath stroke='%23fff' stroke-linecap='round' stroke-miterlimit='1' stroke-width='1.3' d='m287 278 3-2m-12-17 8-2m-8-3h4m-4-13 8 2m-8 3h4m-1-13 7 3m-4-11 7 4m-2-11 6 6m0-12 6 7m1-11 4 6m4-10 3 7m5-9 2 7m15-7-1 7m10-5-3 7m11-4-4 7m11-2-5 6m16 7-7 4m10 4-7 3m10 6-8 1m8 16-8-2m5 10-7-3m4 11-7-4m2 11-6-5m0 11-5-6m-2 11-4-7m-4 11-3-8m-6 10-1-8m-16 8 2-8m-10 5 3-7m-11 4 4-7m-11 2 5-6m-8 3 3-3m4 8 2-3m5 8 2-4m6 7 1-4m8 5v-4m8 4v-4m9 3-1-4m9 1-2-4m9 0-2-4m9-2-3-3m8-4-3-2m8-5-4-2m7-6-4-1m5-8h-4m4-8h-4m3-9-4 1m1-9-4 2m-1-9-3 2m-2-9-3 3m-4-8-2 3m-5-8-2 4m-6-6-1 3m-8-5v4m-8-4v4m-9-2 1 3m-9 0 2 3m-9 1 2 3m-9 2 3 3m-8 4 3 2m-8 5 4 2m-7 6 4 1m-4 25 4-1m-2 5 7-3m-6 7 4-2m-2 6 7-4m-13-21h8m41-41v-8m0 99v-8m49-42h-8' transform='translate(-65 8)' /%3E%3C/svg%3E)
동기
컴퓨터의 파일을 생각할 때 파일 계층 구조를 떠올릴 것입니다. 운영체제의 파일 탐색기로 탐색할 수 있는 폴더에 파일이 정리되어 있습니다. 예를 들어 Windows에서 Tom이라는 사용자의 할 일 목록은 C:\Users\Tom\Documents\ToDo.txt에 있을 수 있습니다. 이 예시에서 ToDo.txt는 파일 이름이고 Users, Tom, Documents는 폴더 이름입니다. Windows의 `C:` 는 드라이브의 루트 디렉터리를 나타냅니다.
웹에서 파일을 사용하는 기존 방식
웹 애플리케이션에서 할 일 목록을 수정하는 일반적인 흐름은 다음과 같습니다.
- 사용자가 파일을 서버에 업로드하거나 클라이언트에서
<input type="file">로 엽니다. - 사용자가 변경사항을 적용한 후 JavaScript를 통해 프로그래매틱 방식으로
click()된<a download="ToDo.txt>가 삽입된 결과 파일을 다운로드합니다. - 폴더를 여는 데는
<input type="file" webkitdirectory>의 특수 속성을 사용합니다. 이 속성은 독점적인 이름에도 불구하고 사실상 범용 브라우저 지원을 제공합니다.
웹에서 파일을 사용하는 현대적인 방식
이 흐름은 사용자가 파일을 수정하는 방식을 나타내지 않으며, 사용자가 입력 파일의 다운로드된 사본을 갖게 됩니다. 따라서 File System Access API에서는 이름이 나타내는 작업을 정확히 실행하는 세 가지 선택기 메서드(showOpenFilePicker(), showSaveFilePicker(), showDirectoryPicker())를 도입했습니다. 다음과 같은 흐름을 지원합니다.
showOpenFilePicker()으로ToDo.txt을 열고FileSystemFileHandle객체를 가져옵니다.FileSystemFileHandle객체에서 파일 핸들의getFile()메서드를 호출하여File를 가져옵니다.- 파일을 수정한 다음 핸들에서
requestPermission({mode: 'readwrite'})를 호출합니다. - 사용자가 권한 요청을 수락하면 변경사항을 원본 파일에 다시 저장합니다.
- 또는
showSaveFilePicker()를 호출하여 사용자가 새 파일을 선택하도록 합니다. (사용자가 이전에 열었던 파일을 선택하면 해당 파일의 콘텐츠가 덮어쓰여집니다.) 반복 저장의 경우 파일 핸들을 유지하여 파일 저장 대화상자를 다시 표시하지 않아도 됩니다.
웹에서 파일 작업 시 제한사항
이러한 메서드를 통해 액세스할 수 있는 파일과 폴더는 사용자에게 표시되는 파일 시스템에 있습니다. 웹에서 저장된 파일, 특히 실행 파일은 웹 표시로 표시되므로 잠재적으로 위험한 파일이 실행되기 전에 운영체제에서 표시할 수 있는 추가 경고가 있습니다. 추가 보안 기능으로 웹에서 가져온 파일도 세이프 브라우징으로 보호됩니다. 이 기능은 간편하게 설명하기 위해 이 도움말의 맥락에서 클라우드 기반 바이러스 검사로 생각할 수 있습니다. File System Access API를 사용하여 파일에 데이터를 쓸 때는 쓰기가 인플레이스가 아니라 임시 파일을 사용합니다. 이러한 보안 검사를 모두 통과하지 않으면 파일 자체가 수정되지 않습니다. 이 작업으로 인해 가능한 경우(예: macOS) 개선사항이 적용되더라도 파일 작업이 상대적으로 느려집니다. 하지만 모든 write() 호출은 독립적이므로 내부적으로 파일을 열고, 지정된 오프셋으로 이동하고, 마지막으로 데이터를 씁니다.
파일을 처리의 기반으로 사용
파일은 데이터를 기록하는 데도 유용합니다. 예를 들어 SQLite는 전체 데이터베이스를 단일 파일에 저장합니다. 이미지 처리에 사용되는 밉맵도 그 예입니다. 밉맵은 사전 계산되고 최적화된 이미지 시퀀스로, 각 이미지는 이전 이미지의 해상도가 점진적으로 낮아진 표현이므로 확대/축소와 같은 많은 작업을 더 빠르게 실행할 수 있습니다. 그렇다면 웹 애플리케이션은 웹 기반 파일 처리의 성능 비용 없이 파일의 이점을 어떻게 얻을 수 있을까요? 답은 origin private file system입니다.
사용자에게 표시되는 파일 시스템과 출처 비공개 파일 시스템
운영체제의 파일 탐색기를 사용하여 탐색하는 사용자 표시 파일 시스템과 달리 파일을 읽고, 쓰고, 이동하고, 이름을 바꿀 수 있는 폴더가 있는 원본 비공개 파일 시스템은 사용자가 볼 수 없습니다. 이름에서 알 수 있듯이 원본 비공개 파일 시스템의 파일과 폴더는 비공개이며, 구체적으로는 사이트의 원본에 비공개입니다. DevTools 콘솔에 location.origin을 입력하여 페이지의 출처를 알아봅니다. 예를 들어 https://developer.chrome.com/articles/ 페이지의 출처는 https://developer.chrome.com입니다 (즉, /articles 부분은 출처에 포함되지 않습니다). 출처 이론에 관한 자세한 내용은 '동일 사이트' 및 '동일 출처' 이해하기를 참고하세요. 동일한 출처를 공유하는 모든 페이지는 동일한 출처 비공개 파일 시스템 데이터를 볼 수 있으므로 https://developer.chrome.com/docs/extensions/mv3/getstarted/extensions-101/는 이전 예와 동일한 세부정보를 볼 수 있습니다. 각 출처에는 자체적인 독립적인 출처 비공개 파일 시스템이 있으므로 https://developer.chrome.com의 출처 비공개 파일 시스템은 예를 들어 https://web.dev의 출처 비공개 파일 시스템과 완전히 다릅니다. Windows에서 사용자에게 표시되는 파일 시스템의 루트 디렉터리는 C:\\입니다.
원본 비공개 파일 시스템의 경우 비동기 메서드 navigator.storage.getDirectory()를 호출하여 액세스하는 원본당 초기에는 비어 있는 루트 디렉터리가 이에 해당합니다.
사용자에게 표시되는 파일 시스템과 출처 비공개 파일 시스템을 비교하려면 다음 다이어그램을 참고하세요. 다이어그램을 보면 루트 디렉터리를 제외한 모든 것이 개념적으로 동일하며, 데이터 및 저장소 요구사항에 따라 정리하고 정렬할 수 있는 파일 및 폴더 계층 구조가 있습니다.

원본 비공개 파일 시스템의 세부사항
브라우저의 다른 저장소 메커니즘 (예: localStorage 또는 IndexedDB)과 마찬가지로 출처 비공개 파일 시스템에는 브라우저 할당량 제한이 적용됩니다. 사용자가 모든 탐색 데이터 또는 모든 사이트 데이터를 삭제하면 출처 비공개 파일 시스템도 삭제됩니다. navigator.storage.estimate()를 호출하고 결과 응답 객체에서 usage 항목을 확인하여 앱이 이미 사용한 저장소의 양을 확인합니다. 이는 usageDetails 객체의 저장소 메커니즘별로 분류되며, 여기에서 특히 fileSystem 항목을 확인합니다. 출처 비공개 파일 시스템은 사용자에게 표시되지 않으므로 권한 프롬프트도 없고 세이프 브라우징 검사도 없습니다.
루트 디렉터리 액세스
루트 디렉터리에 액세스하려면 다음 명령어를 실행합니다. 결과적으로 빈 디렉터리 핸들, 더 구체적으로는 FileSystemDirectoryHandle이 생성됩니다.
const opfsRoot = await navigator.storage.getDirectory();
// A FileSystemDirectoryHandle whose type is "directory"
// and whose name is "".
console.log(opfsRoot);
기본 스레드 또는 웹 워커
오리진 비공개 파일 시스템은 기본 스레드 또는 웹 워커에서 사용할 수 있습니다. Web Worker는 기본 스레드를 차단할 수 없으므로 이 컨텍스트에서 API는 동기식일 수 있습니다. 이는 일반적으로 기본 스레드에서 허용되지 않는 패턴입니다. 동기 API는 프로미스를 처리하지 않아도 되므로 더 빠를 수 있으며, 파일 작업은 일반적으로 WebAssembly로 컴파일할 수 있는 C와 같은 언어에서 동기식입니다.
// This is synchronous C code.
FILE *f;
f = fopen("example.txt", "w+");
fputs("Some text\n", f);
fclose(f);
가능한 한 가장 빠른 파일 작업이 필요하거나 WebAssembly를 다루는 경우 웹 워커에서 출처 비공개 파일 시스템 사용으로 건너뛰세요. 그렇지 않은 경우 계속 읽으세요.
기본 스레드에서 출처 비공개 파일 시스템 사용
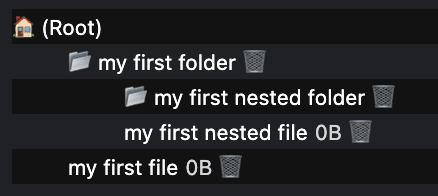
새 파일 및 폴더 만들기
루트 폴더가 있으면 getFileHandle() 및 getDirectoryHandle() 메서드를 각각 사용하여 파일과 폴더를 만듭니다. {create: true}를 전달하면 파일 또는 폴더가 없는 경우 생성됩니다. 새로 만든 디렉터리를 시작점으로 사용하여 이러한 함수를 호출하여 파일 계층 구조를 빌드합니다.
const fileHandle = await opfsRoot
    .getFileHandle('my first file', {create: true});
const directoryHandle = await opfsRoot
    .getDirectoryHandle('my first folder', {create: true});
const nestedFileHandle = await directoryHandle
    .getFileHandle('my first nested file', {create: true});
const nestedDirectoryHandle = await directoryHandle
    .getDirectoryHandle('my first nested folder', {create: true});
기존 파일 및 폴더에 액세스
이름을 알고 있는 경우 파일 또는 폴더의 이름을 전달하여 getFileHandle() 또는 getDirectoryHandle() 메서드를 호출하여 이전에 생성된 파일 및 폴더에 액세스합니다.
const existingFileHandle = await opfsRoot.getFileHandle('my first file');
const existingDirectoryHandle = await opfsRoot
    .getDirectoryHandle('my first folder');
읽기용 파일 핸들과 연결된 파일 가져오기
FileSystemFileHandle은 파일 시스템의 파일을 나타냅니다. 연결된 File를 가져오려면 getFile() 메서드를 사용합니다. File 객체는 특정 종류의 Blob이며 Blob가 사용될 수 있는 모든 컨텍스트에서 사용될 수 있습니다. 특히 FileReader, URL.createObjectURL(), createImageBitmap(), XMLHttpRequest.send()은 Blobs와 Files를 모두 허용합니다. FileSystemFileHandle에서 File를 획득하면 데이터가 '해제'되므로 데이터에 액세스하여 사용자에게 표시되는 파일 시스템에서 사용할 수 있습니다.
const file = await fileHandle.getFile();
console.log(await file.text());
스트리밍으로 파일에 쓰기
createWritable()를 호출하여 파일로 데이터를 스트리밍합니다. 그러면 콘텐츠를 write()하는 FileSystemWritableFileStream가 생성됩니다. 마지막으로 스트림을 close()해야 합니다.
const contents = 'Some text';
// Get a writable stream.
const writable = await fileHandle.createWritable();
// Write the contents of the file to the stream.
await writable.write(contents);
// Close the stream, which persists the contents.
await writable.close();
파일 및 폴더 삭제
파일 또는 디렉터리 핸들의 특정 remove() 메서드를 호출하여 파일과 폴더를 삭제합니다. 모든 하위 폴더를 포함한 폴더를 삭제하려면 {recursive: true} 옵션을 전달합니다.
await fileHandle.remove();
await directoryHandle.remove({recursive: true});
또는 디렉터리에서 삭제할 파일이나 폴더의 이름을 알고 있다면 removeEntry() 메서드를 사용하세요.
directoryHandle.removeEntry('my first nested file');
파일 및 폴더 이동 및 이름 바꾸기
move() 메서드를 사용하여 파일과 폴더의 이름을 바꾸고 이동합니다. 이동과 이름 변경은 함께 또는 별도로 발생할 수 있습니다.
// Rename a file.
await fileHandle.move('my first renamed file');
// Move a file to another directory.
await fileHandle.move(nestedDirectoryHandle);
// Move a file to another directory and rename it.
await fileHandle
    .move(nestedDirectoryHandle, 'my first renamed and now nested file');
파일 또는 폴더의 경로 확인
참조 디렉터리를 기준으로 특정 파일 또는 폴더가 어디에 있는지 알아보려면 resolve() 메서드를 사용하고 FileSystemHandle를 인수로 전달합니다. 원본 비공개 파일 시스템에서 파일 또는 폴더의 전체 경로를 가져오려면 navigator.storage.getDirectory()를 통해 가져온 루트 디렉터리를 참조 디렉터리로 사용하세요.
const relativePath = await opfsRoot.resolve(nestedDirectoryHandle);
// `relativePath` is `['my first folder', 'my first nested folder']`.
두 파일 또는 폴더 핸들이 동일한 파일 또는 폴더를 가리키는지 확인합니다.
핸들이 두 개인데 동일한 파일이나 폴더를 가리키는지 알 수 없는 경우가 있습니다. 이를 확인하려면 isSameEntry() 메서드를 사용합니다.
fileHandle.isSameEntry(nestedFileHandle);
// Returns `false`.
폴더의 콘텐츠 나열
FileSystemDirectoryHandle는 for await…of 루프로 반복하는 비동기 반복자입니다. 비동기 반복자이므로 entries(), values(), keys() 메서드도 지원하며, 필요한 정보에 따라 선택할 수 있습니다.
for await (let [name, handle] of directoryHandle) {}
for await (let [name, handle] of directoryHandle.entries()) {}
for await (let handle of directoryHandle.values()) {}
for await (let name of directoryHandle.keys()) {}
폴더와 모든 하위 폴더의 콘텐츠를 재귀적으로 나열합니다.
재귀와 함께 비동기 루프 및 함수를 처리하는 것은 잘못되기 쉽습니다. 아래 함수는 모든 파일과 크기를 포함하여 폴더와 모든 하위 폴더의 콘텐츠를 나열하는 시작점으로 사용할 수 있습니다. directoryEntryPromises.push에 handle.getFile() 약속이 아닌 handle를 직접 푸시하여 파일 크기가 필요하지 않은 경우 함수를 간소화할 수 있습니다.
  const getDirectoryEntriesRecursive = async (
    directoryHandle,
    relativePath = '.',
  ) => {
    const fileHandles = [];
    const directoryHandles = [];
    const entries = {};
    // Get an iterator of the files and folders in the directory.
    const directoryIterator = directoryHandle.values();
    const directoryEntryPromises = [];
    for await (const handle of directoryIterator) {
      const nestedPath = `${relativePath}/${handle.name}`;
      if (handle.kind === 'file') {
        fileHandles.push({ handle, nestedPath });
        directoryEntryPromises.push(
          handle.getFile().then((file) => {
            return {
              name: handle.name,
              kind: handle.kind,
              size: file.size,
              type: file.type,
              lastModified: file.lastModified,
              relativePath: nestedPath,
              handle
            };
          }),
        );
      } else if (handle.kind === 'directory') {
        directoryHandles.push({ handle, nestedPath });
        directoryEntryPromises.push(
          (async () => {
            return {
              name: handle.name,
              kind: handle.kind,
              relativePath: nestedPath,
              entries:
                  await getDirectoryEntriesRecursive(handle, nestedPath),
              handle,
            };
          })(),
        );
      }
    }
    const directoryEntries = await Promise.all(directoryEntryPromises);
    directoryEntries.forEach((directoryEntry) => {
      entries[directoryEntry.name] = directoryEntry;
    });
    return entries;
  };
웹 워커에서 출처 비공개 파일 시스템 사용
앞서 설명한 것처럼 웹 워커는 기본 스레드를 차단할 수 없으므로 이 컨텍스트에서는 동기 메서드가 허용됩니다.
동기 액세스 핸들 가져오기
가장 빠른 파일 작업의 진입점은 createSyncAccessHandle()를 호출하여 일반 FileSystemFileHandle에서 가져온 FileSystemSyncAccessHandle입니다.
const fileHandle = await opfsRoot
    .getFileHandle('my highspeed file.txt', {create: true});
const syncAccessHandle = await fileHandle.createSyncAccessHandle();
동기식 인플레이스 파일 메서드
동기 액세스 핸들이 있으면 모두 동기적인 빠른 인플레이스 파일 메서드에 액세스할 수 있습니다.
getSize(): 파일 크기를 바이트 단위로 반환합니다.write(): 버퍼의 콘텐츠를 파일에 씁니다(선택적으로 지정된 오프셋에서). 쓰여진 바이트 수를 반환합니다. 반환된 쓰기 바이트 수를 확인하면 호출자가 오류와 부분 쓰기를 감지하고 처리할 수 있습니다.read(): 파일의 콘텐츠를 버퍼로 읽어옵니다(선택적으로 지정된 오프셋에서).truncate(): 파일을 지정된 크기로 조정합니다.flush(): 파일의 콘텐츠에write()을 통해 실행된 모든 수정사항이 포함되도록 합니다.close(): 액세스 핸들을 닫습니다.
다음은 위에 언급된 모든 메서드를 사용하는 예입니다.
const opfsRoot = await navigator.storage.getDirectory();
const fileHandle = await opfsRoot.getFileHandle('fast', {create: true});
const accessHandle = await fileHandle.createSyncAccessHandle();

const textEncoder = new TextEncoder();
const textDecoder = new TextDecoder();

// Initialize this variable for the size of the file.
let size;
// The current size of the file, initially `0`.
size = accessHandle.getSize();
// Encode content to write to the file.
const content = textEncoder.encode('Some text');
// Write the content at the beginning of the file.
accessHandle.write(content, {at: size});
// Flush the changes.
accessHandle.flush();
// The current size of the file, now `9` (the length of "Some text").
size = accessHandle.getSize();

// Encode more content to write to the file.
const moreContent = textEncoder.encode('More content');
// Write the content at the end of the file.
accessHandle.write(moreContent, {at: size});
// Flush the changes.
accessHandle.flush();
// The current size of the file, now `21` (the length of
// "Some textMore content").
size = accessHandle.getSize();

// Prepare a data view of the length of the file.
const dataView = new DataView(new ArrayBuffer(size));

// Read the entire file into the data view.
accessHandle.read(dataView);
// Logs `"Some textMore content"`.
console.log(textDecoder.decode(dataView));

// Read starting at offset 9 into the data view.
accessHandle.read(dataView, {at: 9});
// Logs `"More content"`.
console.log(textDecoder.decode(dataView));

// Truncate the file after 4 bytes.
accessHandle.truncate(4);
출처 비공개 파일 시스템에서 사용자에게 표시되는 파일 시스템으로 파일 복사
위에서 언급한 것처럼 원본 비공개 파일 시스템에서 사용자에게 표시되는 파일 시스템으로 파일을 이동할 수는 없지만 파일을 복사할 수는 있습니다. showSaveFilePicker()는 기본 스레드에서만 노출되고 작업자 스레드에서는 노출되지 않으므로 코드를 기본 스레드에서 실행해야 합니다.
// On the main thread, not in the Worker. This assumes
// `fileHandle` is the `FileSystemFileHandle` you obtained
// the `FileSystemSyncAccessHandle` from in the Worker
// thread. Be sure to close the file in the Worker thread first.
const fileHandle = await opfsRoot.getFileHandle('fast');
try {
  // Obtain a file handle to a new file in the user-visible file system
  // with the same name as the file in the origin private file system.
  const saveHandle = await showSaveFilePicker({
    suggestedName: fileHandle.name || ''
  });
  const writable = await saveHandle.createWritable();
  await writable.write(await fileHandle.getFile());
  await writable.close();
} catch (err) {
  console.error(err.name, err.message);
}
원본 비공개 파일 시스템 디버그
기본 DevTools 지원이 추가될 때까지 (crbug/1284595 참고) OPFS 탐색기 Chrome 확장 프로그램을 사용하여 출처 비공개 파일 시스템을 디버그하세요. 새 파일 및 폴더 만들기 섹션의 위 스크린샷은 확장 프로그램에서 바로 가져온 것입니다.
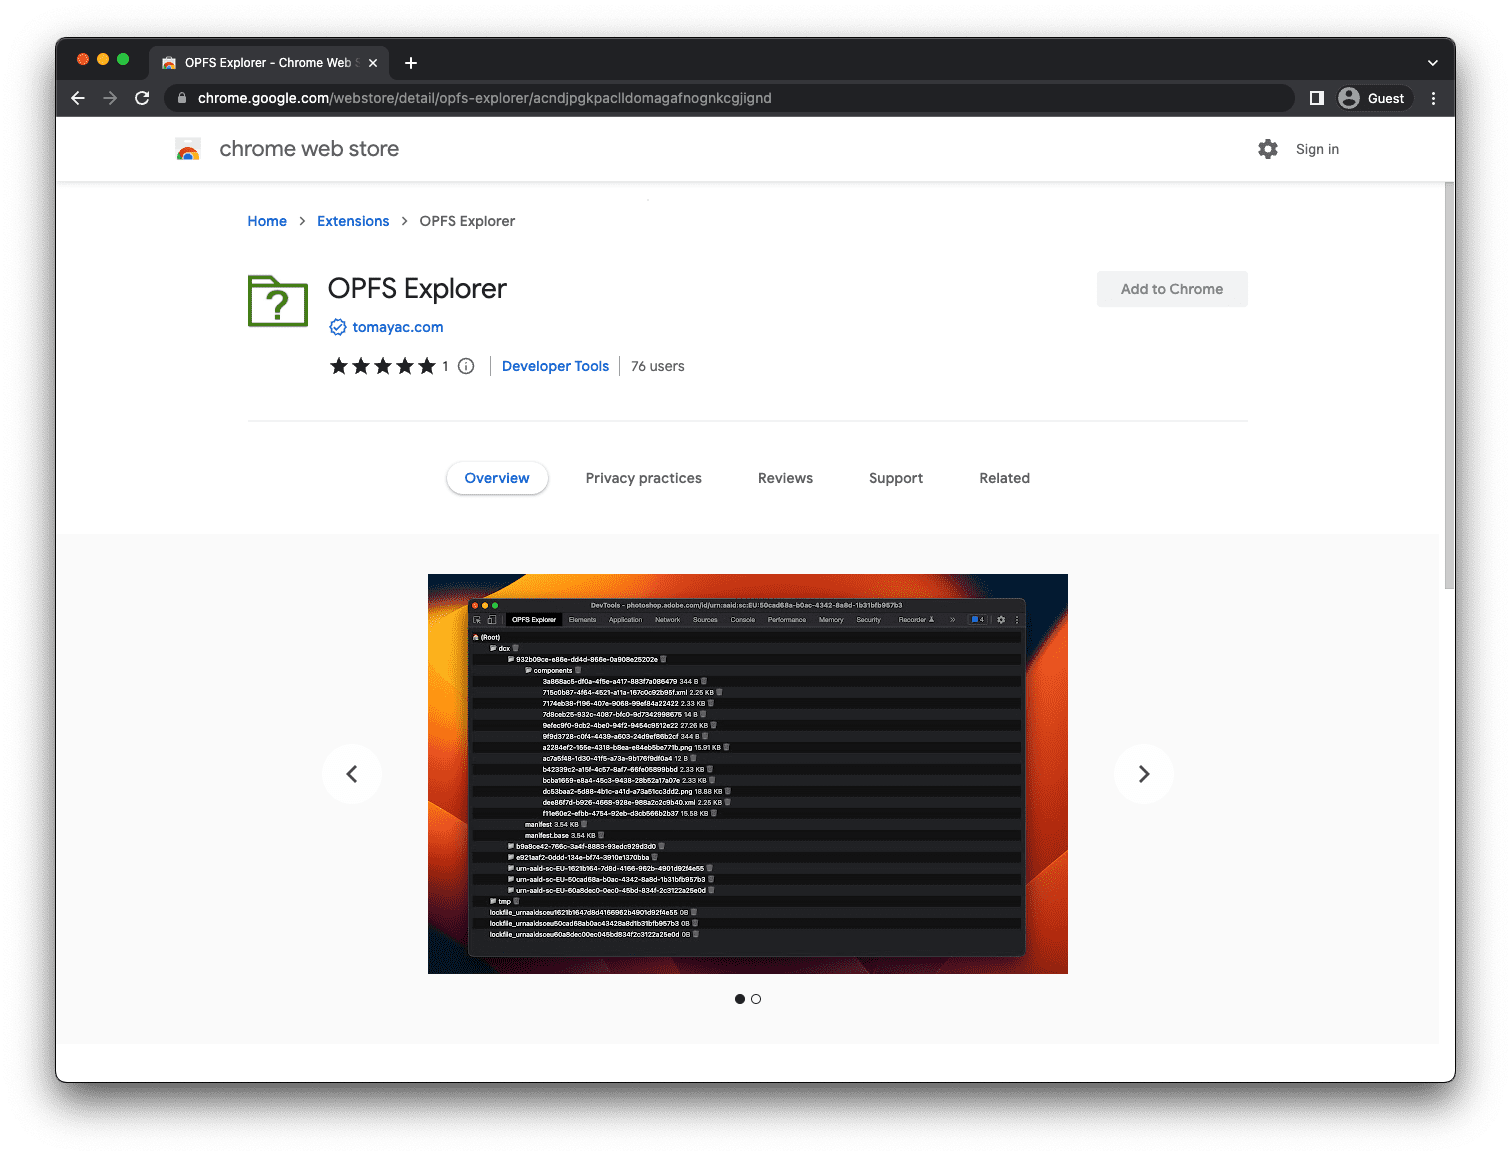
확장 프로그램을 설치한 후 Chrome DevTools를 열고 OPFS 탐색기 탭을 선택하면 파일 계층 구조를 검사할 수 있습니다. 파일 이름을 클릭하여 출처 비공개 파일 시스템의 파일을 사용자에게 표시되는 파일 시스템에 저장하고, 휴지통 아이콘을 클릭하여 파일과 폴더를 삭제합니다.
데모
WebAssembly로 컴파일된 SQLite 데이터베이스의 백엔드로 사용하는 데모에서 출처 비공개 파일 시스템이 작동하는 것을 확인하세요 (OPFS 탐색기 확장 프로그램을 설치한 경우). GitHub의 소스 코드를 확인하세요. 아래에 삽입된 버전은 출처 비공개 파일 시스템 백엔드를 사용하지 않지만 (iframe이 교차 출처이므로) 별도의 탭에서 데모를 열면 사용합니다.
결론
WHATWG에서 지정한 출처 비공개 파일 시스템은 웹에서 파일을 사용하고 상호작용하는 방식을 형성해 왔습니다. 사용자에게 표시되는 파일 시스템으로는 불가능했던 새로운 사용 사례가 가능해졌습니다. Apple, Mozilla, Google 등 모든 주요 브라우저 공급업체가 참여하여 공동 비전을 공유하고 있습니다. 출처 비공개 파일 시스템의 개발은 공동 작업이 매우 중요하며 개발자와 사용자의 의견이 진행에 필수적입니다. 표준을 계속 개선해 나가는 과정에서 whatwg/fs 저장소에 문제 또는 풀 요청 형태로 의견을 보내주시면 감사하겠습니다.
관련 링크
- 파일 시스템 표준 사양
- 파일 시스템 표준 저장소
- Origin Private File System WebKit 게시물이 포함된 File System API
- OPFS 탐색기 확장 프로그램
감사의 말씀
이 도움말은 오스틴 설리, 에티엔 노엘, 레이첼 앤드루가 검토했습니다. 히어로 이미지: Unsplash의 크리스티나 룸프